
Creating a Garden Journal using Bullet Journal Techniques
During my final years at college, I created a crude version of a bullet journal to keep track of all the various classes and activities. That planner was a life saver. Post college I stopped using the planner as the activity level dropped; but in the past few years, I found myself needing to record events and thoughts again, and came across bullet journaling. It has really helped keep life organized, so in the spirit of staying organized, I decided to create a garden journal using the same techniques.
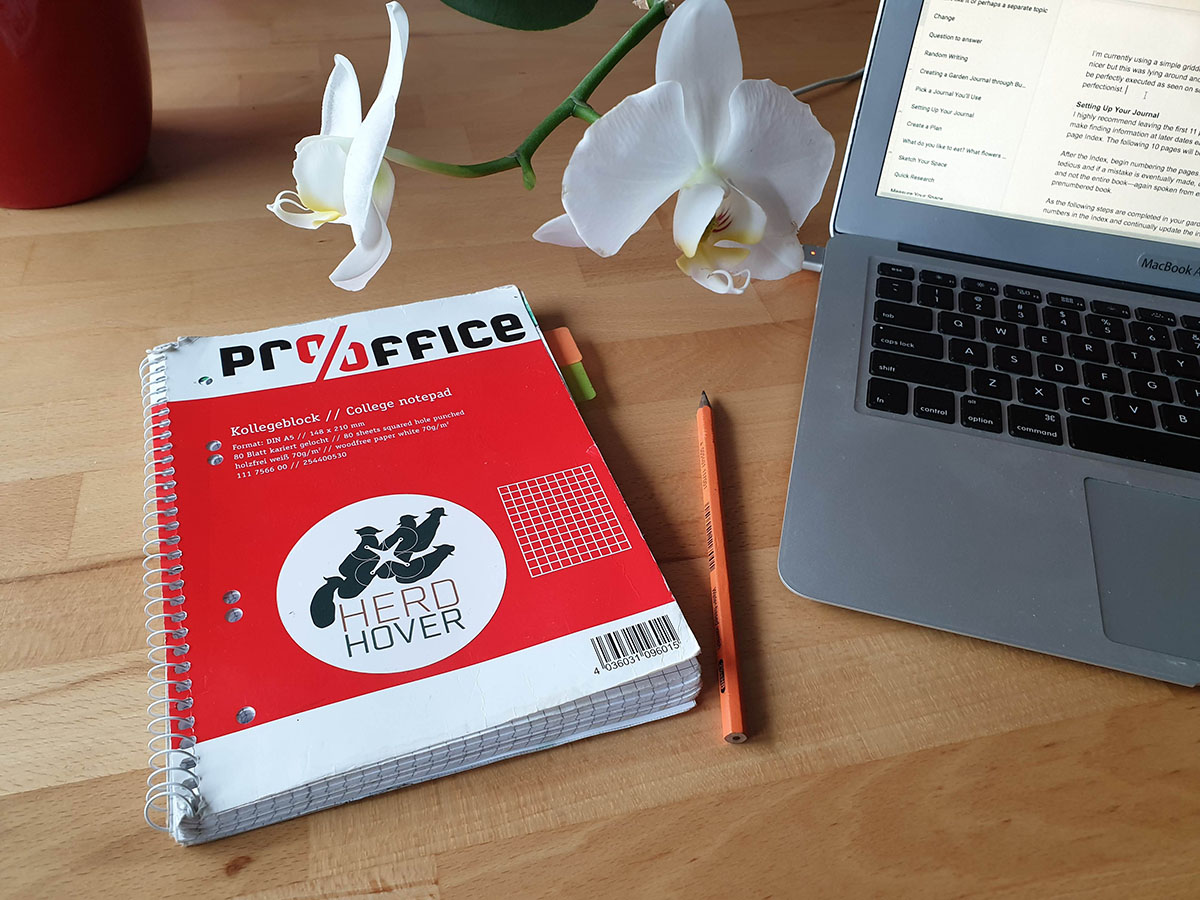
Bonus: stickers can be used to personalize it! This one's from the Herdhover project, a friend of HTD!
I started a garden journal in 2019 because during 2018 I thought, “Nah, I can remember everything: what worked and didn’t work, dates plants sprouted, last frost date, etc.”, but, in all honesty, the human brain has a terrible memory for so many minuscule details. The Kleingarten is fairly large; it’s two allotments as one, not to mention the Balkongarten. There are so many projects and techniques that I’d love to learn and experiment with, it gets difficult to keep track of them. In order to improve, records need to be kept of what happens in a garden to hopefully cultivate a better observer and a better gardener.
This guide is mostly for those who like to write in a notebook or journal and is especially good for those who enjoy Bullet Journaling. Most of the techniques can be modified on the computer as well if you prefer electronic keeping. If you’d like a premade program check this out: https://www.growveg.com/garden-planner-intro.aspx I’ve never used it so I cannot say whether it is useful or not.
Pick a Journal You’ll Use
Any blank book will do. If you’re a journalling beginner find something with lines, grids or dotted grids. It can be as simple as a college notebook or nice as a Moleskine. Pick something you’ll like but nothing too fancy, as it’ll be taken into the garden where it will most likely get dirty and wet.
I’m currently using a simple gridded notebook with a simple layout. Normally I would use something a little nicer but this was lying around and it doesn’t create a mentality of every entry needing to be perfectly executed, as often seen on social media. Keep that in mind if you’re a perfectionist!
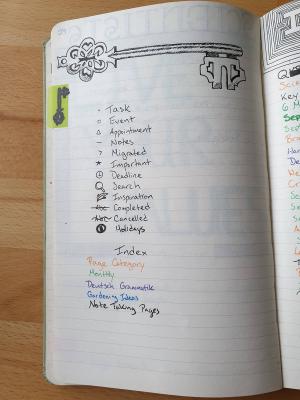
When you have the time, feel free to have fun with your journal through sketching. Here's an example for the Key page. I'm keeping the garden journal layout simple for ease of use.
Setting Up Your Journal
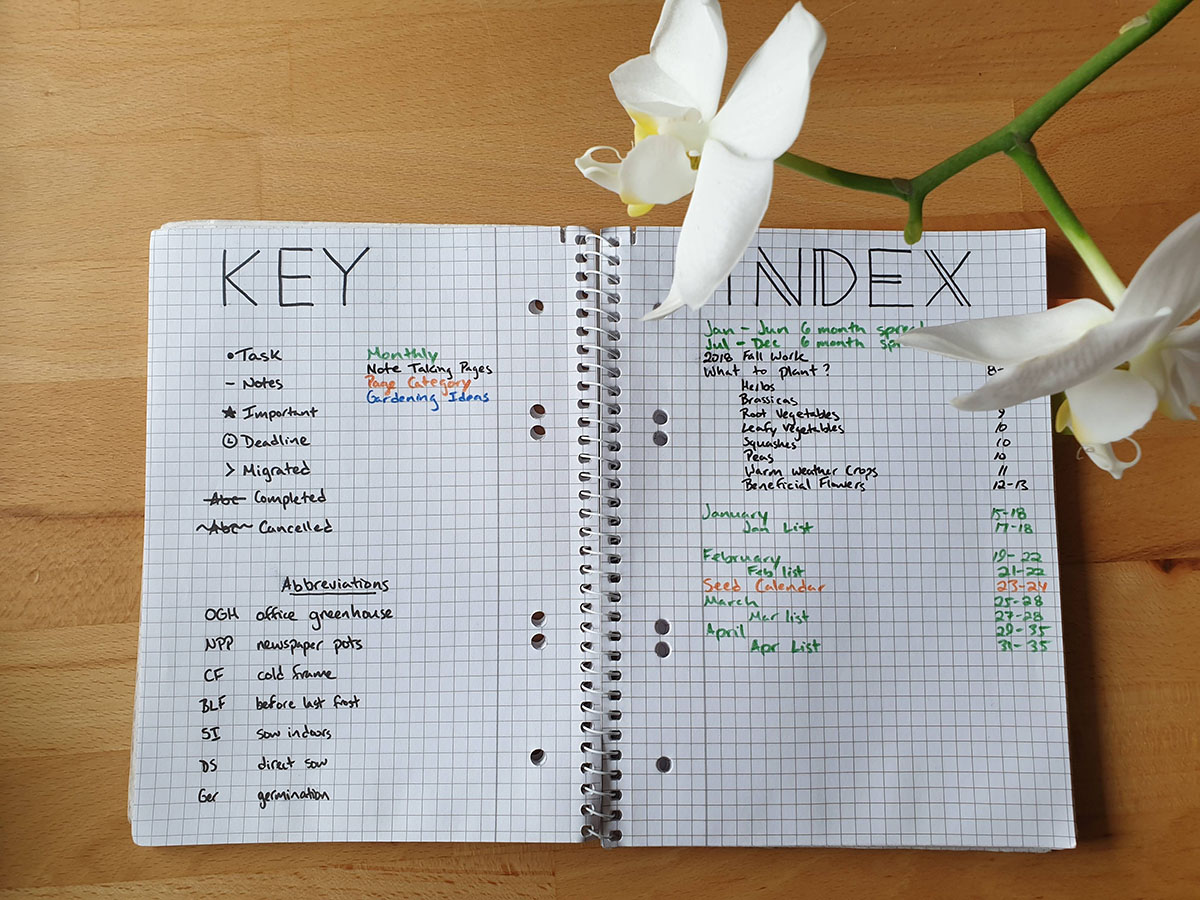
I highly recommend leaving the first 12 pages blank to serve as a key and index. It’ll make finding information later easier. Title the first page as Key and the next page Index. The titled Index page and following 10 pages will be the Index.
After the Index, begin numbering the pages. Just do 10 or 20 pages at a time as this is tedious and if a mistake is made, only a few pages need to be renumbered and not the entire book—spoken from experience. Or better yet, get a prenumbered book.
As the following steps are completed in your garden journal, write the titles and page numbers in the Index and continually update the index throughout the year.
Keep it simple or get creative— keeping mine simple this time around.
Quick notes are great, but feel free to elaborate to work out ideas from your head to the paper. The most important thing is getting them on paper.
Create a Plan
I’m taking advice from Amy Stross at Tenth Acre Farm, https://www.tenthacrefarm.com/four-essential-garden-planning-tools/ a wonderful blog about how to create a permaculture landscape in a suburban setting. The main tip, and most important, is to have a plan. If you don’t have a plan, you won’t be very efficient in executing your ideas—also spoken from experience.
Quick notes are great, but feel free to elaborate to work out ideas from your head to the paper. The most important thing is getting them on paper.
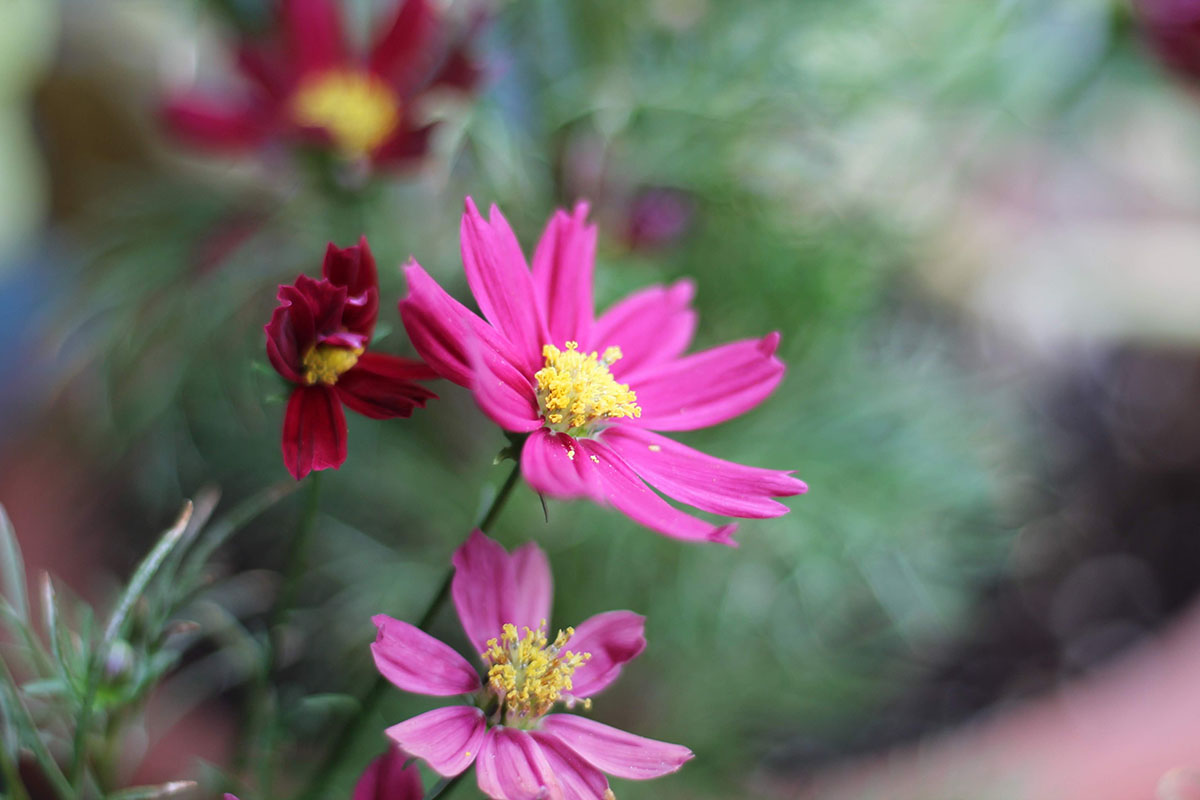
If you only want to grow flowers, these journaling techniques will also help you stay organized. Cosmos from 2019.
What do you like to eat? What flowers do you like?
Start with what you’d like to eat or grow in the garden. Think about what you buy on a weekly or seasonal basis and go from there. Go a little crazy on this step but also be realistic in terms of what you actually eat on a weekly basis, not what you think you should eat. If you try growing things you don’t typically eat but think you should, you’re already setting yourself up for failure. When you’ll be short on time during the growing season you will not give as much care to those Brussels sprouts as you would to the tomatoes and in the end, you’ll waste time and energy which will feel discouraging.
Drawing is good for your brain!
Sketch Your Space
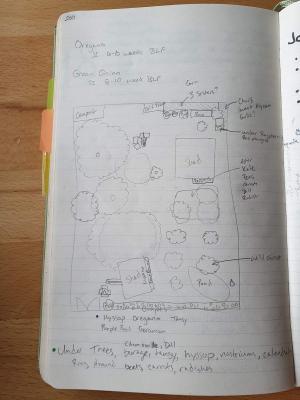
Once you write down the fruits, vegetables and/or flowers you’d like to grow, I strongly suggest you draw a layout of the garden space you’ll be working in. Walk around the garden or balcony with a blank sheet of paper and sketch it from an aerial view or feel free to use Google maps for help. Do your best and draw the tree canopies too. Honestly, I thought I had all the space in the world for everything I wrote down until I drew the tree canopies to roughly estimate shade. Unfortunately, most of what I desired needs full sun, which leads into the next step.
Quick Research
Do some quick research on your list of plants for the lighting, spacing, water, and soil requirements. I suggest you do this in the order given and in conjunction with the sketch. This will quickly determine what will and will not work in the space so you don’t feel overwhelmed and spend tons of time researching only to find out most of your plants won’t work. This will only work if your sketch is a fair representation of the space and not spread out like some of us might mistakenly draw. This is also where Google maps would help if you know your sketch won’t be accurate. Find your map, zoom into the space, print it out, and trace the permanent features to create your sketch.
When I did this in 2019 about 70% of what I wanted to grow was eliminated, which might sound discouraging, but was instead a relief. I could then focus on what had the potential to work rather than wasting time on what wouldn’t. Plus, after recording the year’s successes and failures I now have the list to refer to if I want to try something else for this year’s planning.
2019 list and quick research. After the quick sketch I noticed I wouldn’t have room for the root vegetables and squashes until building the Hugelkultur.
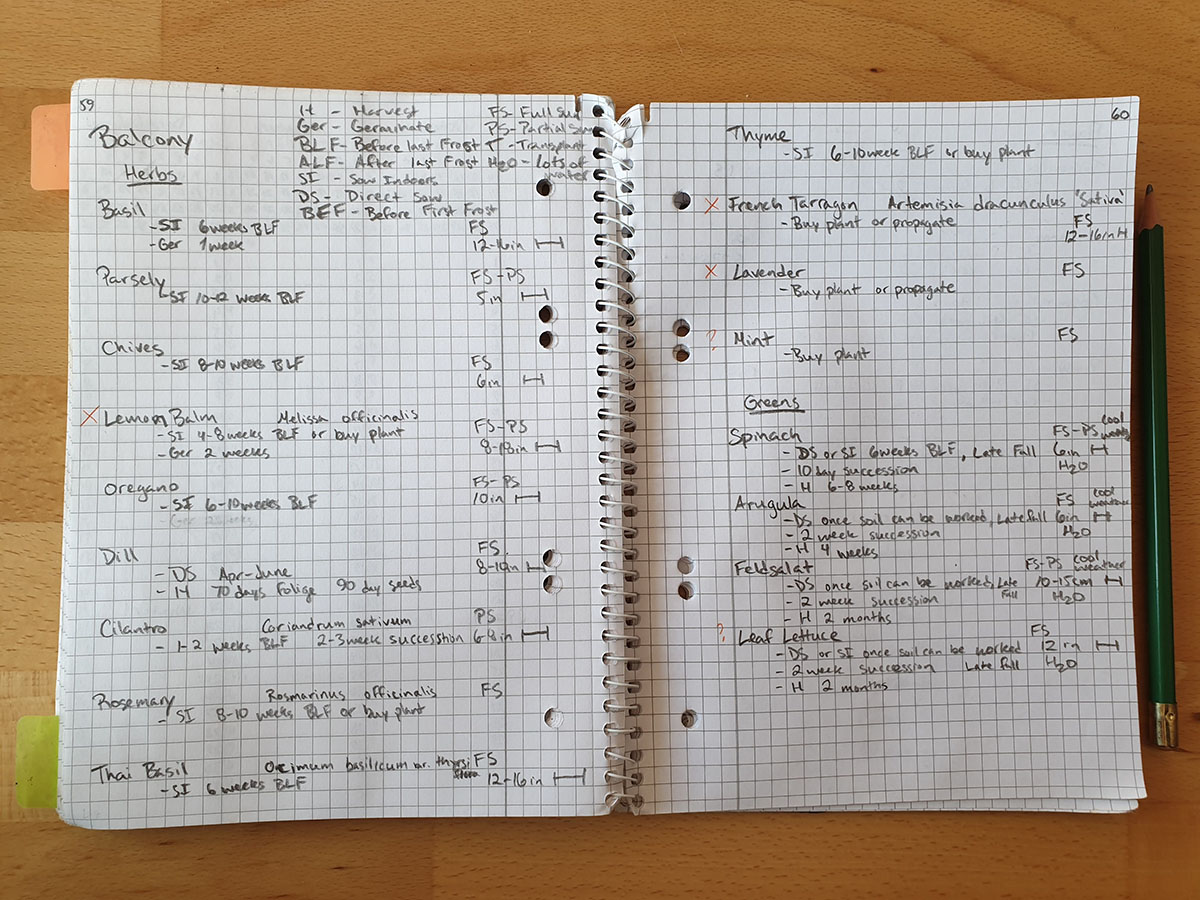
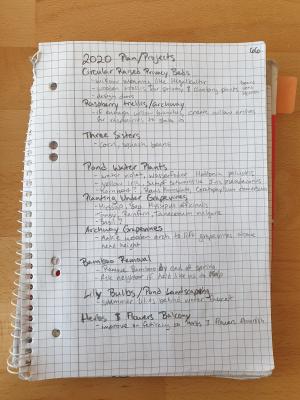
2020 Balcony grow list and quick research. I found the 2019 notes useful while setting up the 2020 journal. Most of this information I referenced from the 2019 list.
Measure Your Space
Now that you have your refined list, place the plants on your sketch of where they’ll be planted. It’s highly recommended by professionals to accurately measure your space. If you’re the kind of person who isn’t fazed by the prospect of measuring then, by all means, skip the rough sketch and create a measured map of your space first. But if you’re like me and would put off planning because of the tedious process of measuring in the first place, start with the rough sketch. For me, measuring is not the fun, creative part of the process, albeit a necessary one, which is why I needed something on paper first as motivation.
After creating a measured map, take your refined list, look up the spacing requirements for each plant, place them on your map, and eliminate anything else that will not fit in the space. It might help to scan and make print outs of your permanent features map, or use tracing paper, so you can make modifications without ruining your original sketch.
We are halfway there! If you plan on growing some or all of your plants from seed continue on, if not skip to Create Monthly Checklists.
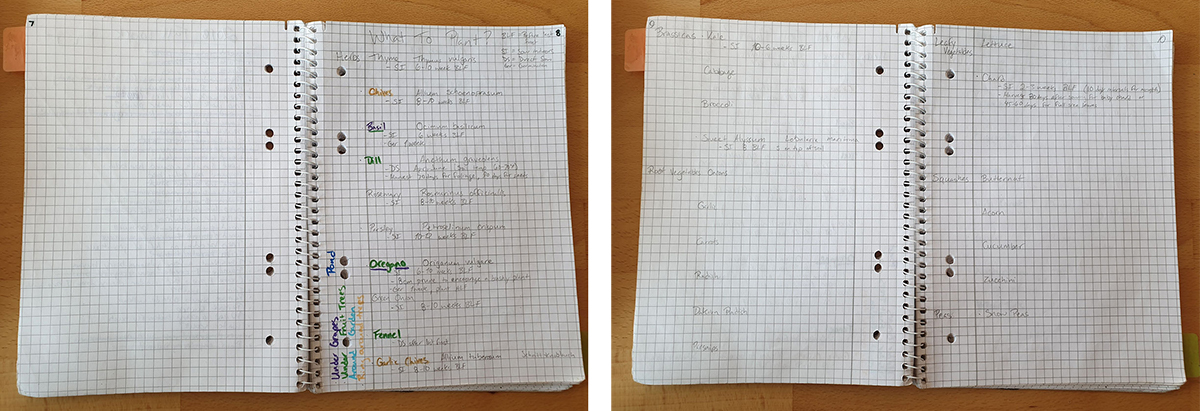
Create a seed calendar
Go through your list, research and write down the “sow indoors” or “direct sow” before the last frost date, transplant dates and harvest dates. This information is approximated in days or weeks so you can arrange it around your area’s frost dates. Most of this can be found online or on the back of seed packets.
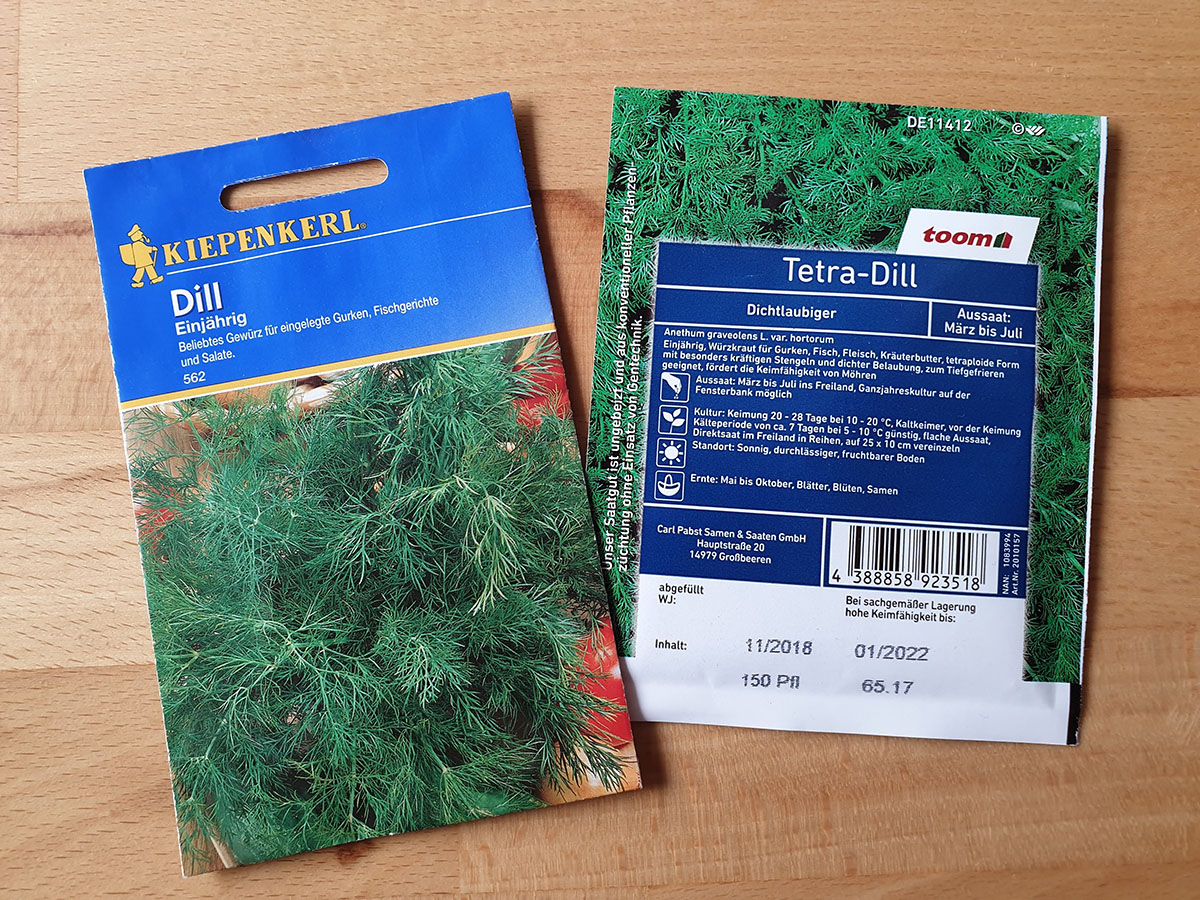
You can see the information on the back
For a detailed explanation on how to make your calendar, check out Starting Your Seed Calendar
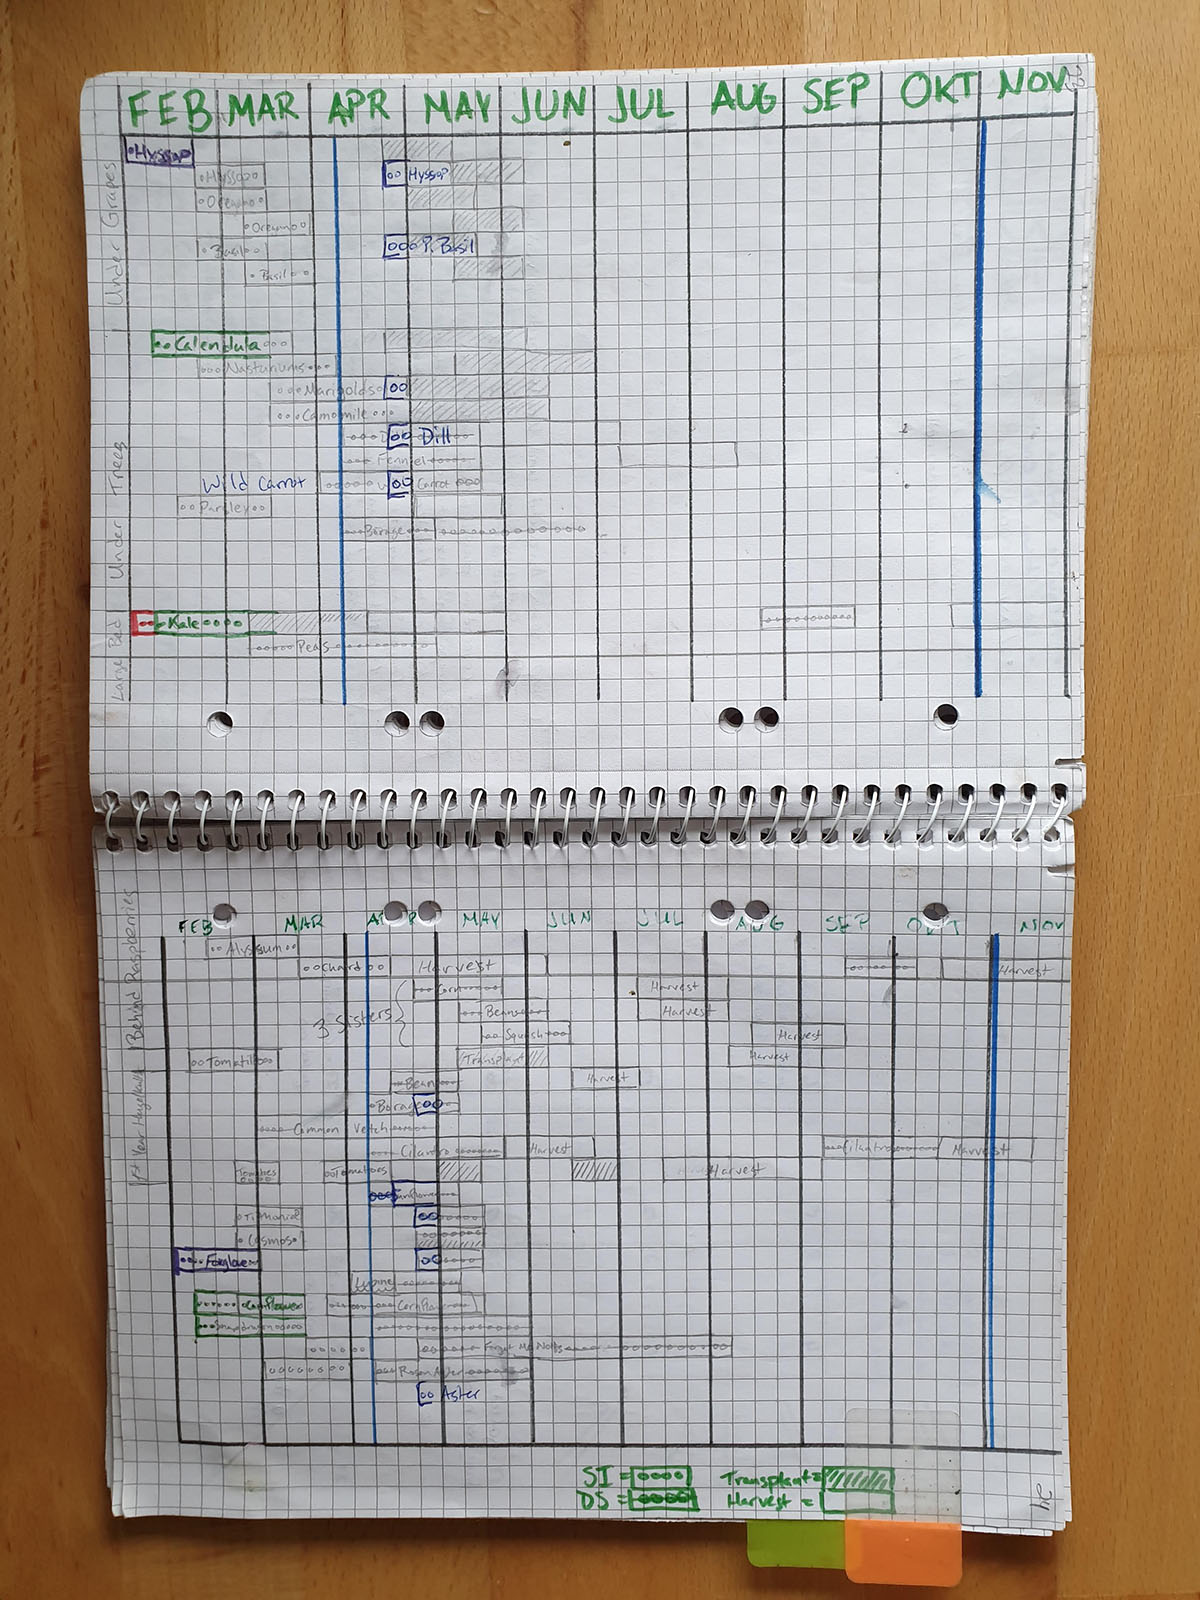
2019 Seed Calendar
Create Monthly Spreads & Checklists
Here’s a lesson from bullet journaling on this one. Create a 6-12 month spread, jot down garden to-dos during those months and add any major life events such as vacations, birthdays, work trips, holidays etc. This will give you a big overview of the year as to when you’ll be in town and what to prepare for when you’re not.
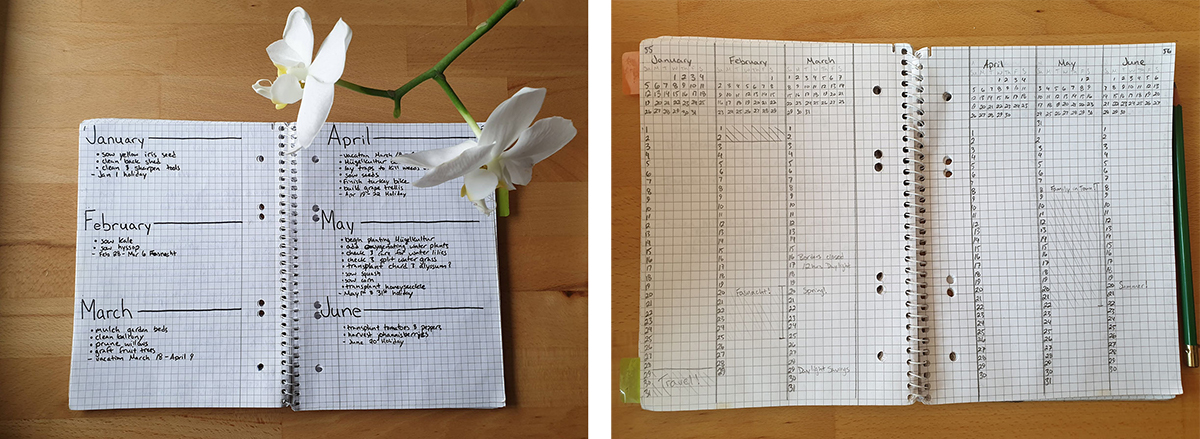
2019 vs 2020 six month spread. There are multiple ways you can record your information; that’s the beauty of bullet journaling techniques. Make it your own!
If you like looking at calendars, then draw or print out and paste a calendar where you can mark the life events from the 6 month spreads, such as vacations, or jot down notes of work done on specific days.
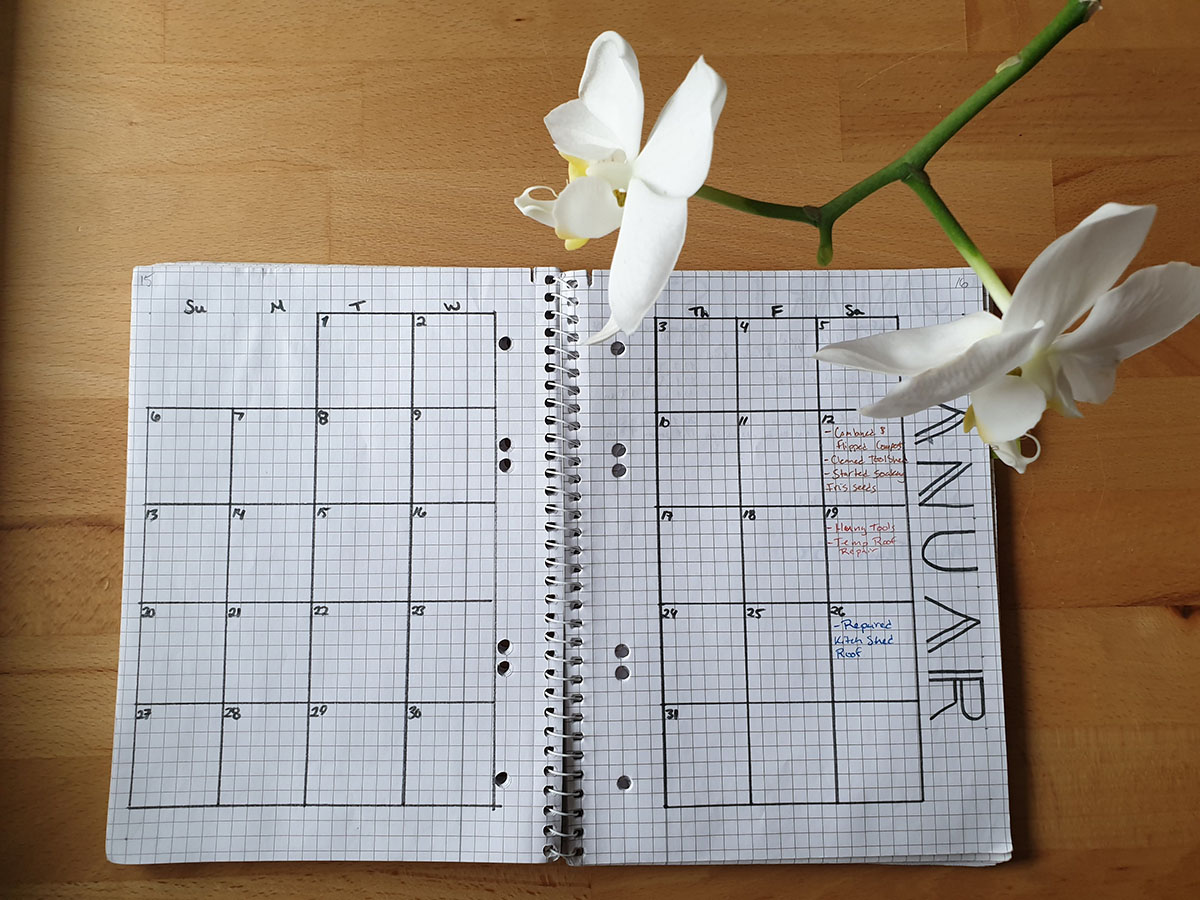
January monthly spread
On the next page, label it as the monthly checklist where you’ll record tasks, date completed or notes/observations in the month. As the year progresses this is where referring to that yearly spread comes in handy so you don’t forget something.
For 2020 I’m going to reserve the calendar page for observations in the garden, such as bloom times, average weekly temperatures, etc., and the monthly checklist for tasks completed and harvest yields. This way I’m not recording the tasks twice and the garden observations are not buried on the tasks page (see April 2019 list below).
Do not create your calendar pages and lists too far in advance. Clearly January doesn’t have much going on and requires only one page for the list. Below is April. It required 4-5 list pages to accommodate the tasks completed, seed sowing notes and observations in the garden.
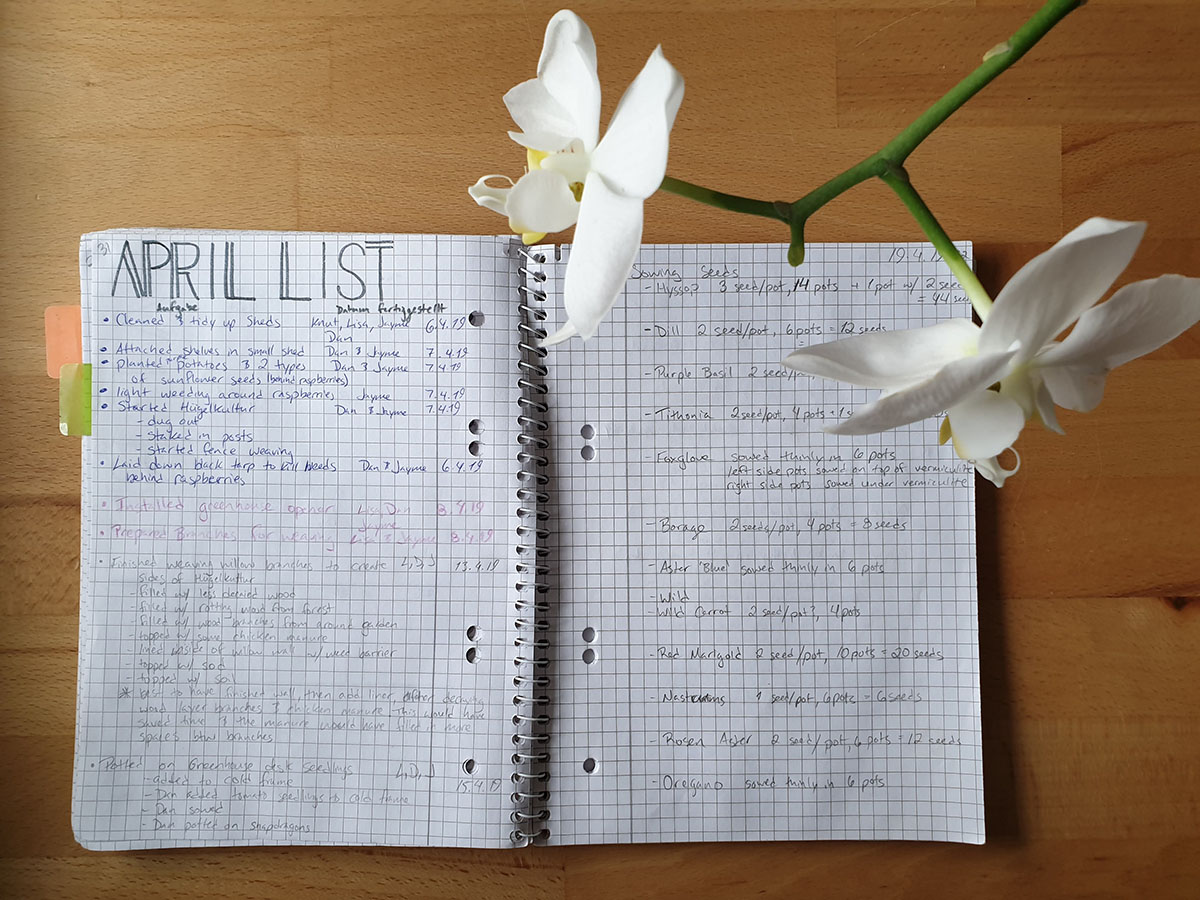
April was busy
Create a Harvest Log
Finally, create a harvest log. This is where you’ll record when you harvested and your yields. Due to laziness, I skipped the 2019 summer recording, which I’m already regretting while setting up the 2020 journal. This is a real pain since I can’t remember when we started harvesting and we won’t be able to compare yields. Lesson learned. This year I hope to record yields under the monthly lists page and in winter, add up the yields and record the total amounts on a quick twelve month spread as a close out page for the season.
There you have it, an explanation of how I created a garden journal for the 2019 and 2020 growing seasons. As the year progresses I’ll probably tweak it again: maybe print out and paste some photos inside. Or, if you like drawing, create some sketches. The beauty of a bullet journal style is modifying it to make it your own. Use these tips as guidelines and create something that works best for you. Share your journal, plans, or sketches on instagram or twitter using #gardenbujo2020 and don’t forget to tag me @hereisthedill!
Happy planting!
- Filed to:
- organization
