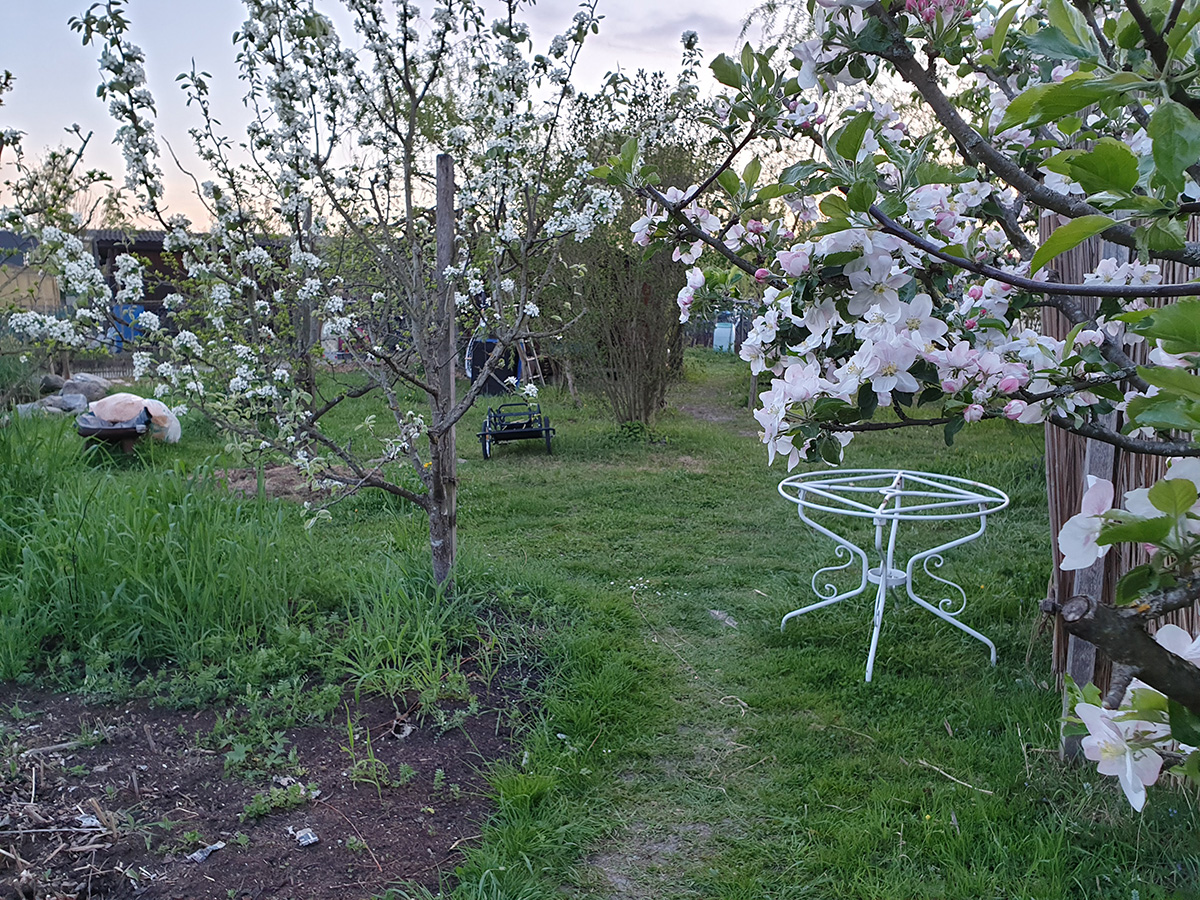
It’s been one month since Germany closed its borders to neighboring countries, one month since we’ve been able to visit the Kleingarten located only 200m (660ft) in Switzerland. It’s a little sad not being able to observe the garden transition into spring. Around this time of year the fruit trees are blooming and it’s the perfect time to celebrate spring by cooking food over a fire. We were lucky enough to enjoy a small picnic, with proper social distancing of course, under the flowering plum tree the day before the closing.
Header: Honeybee collecting pollen from plum tree. The tree was buzzing with activity all day. Here: Fruit trees blooming in the Kleingarten April 2019. The bushy growth on the left was the 2019 winter rye and hairy vetch cover crop.
When we left, the onions and raspberry brushes were awakening from their wintery slumber and we noticed the tiniest of seedlings popping out of the prepared meadow areas from the fall. They were so small that it was undetermined whether they were in fact the meadow seedlings or weeds, though I have the sneaking suspicion that the birds might have helped themselves to the seeds over winter. If we had access to the garden to see if they are weeds, we could have cheated and sowed another round of the mixes and protected them from the birds with a thin layer of fleece until germination.
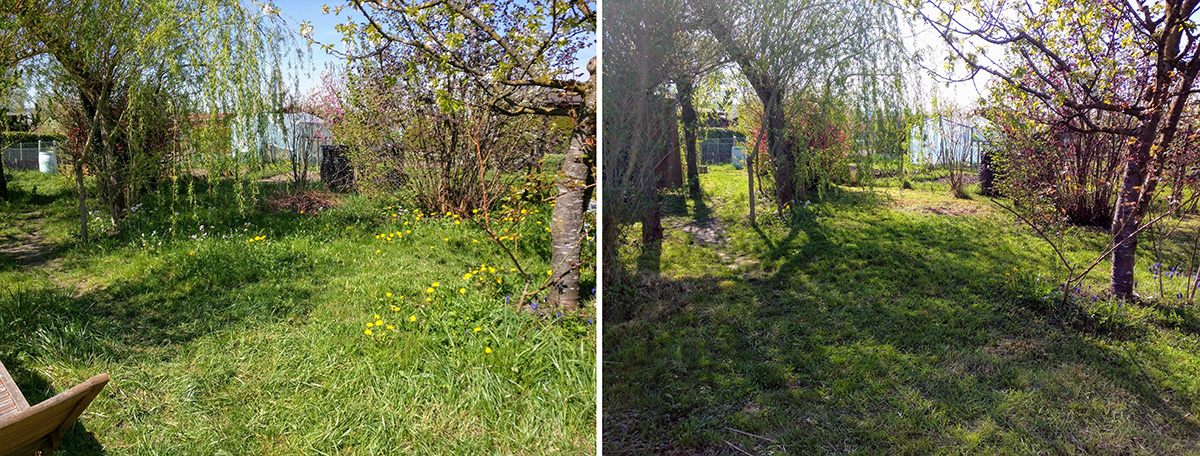
The garden probably looks a bit rough at the moment with overgrown grass, but we enjoy its wild look and in the past have even put off mowing a few extra days to enjoy the casual nature of the space. Before the border closing, Dan, a member of the Schrebergartencrew, sowed peas, carrots, cilantro, spring onions, spinach, and potatoes, of which the carrots and peas had already begun sprouting.
Before and after mowing April 2018
I’m confident the vegetable seedlings will do well in our absence, so long as the slugs show some mercy; I am slightly concerned about the meadows sown last fall, as they are supposed to be mowed by mid-May for the success of the project. It would be a shame to see the hard work from the garden crew go to waste, but there is a more concerning issue that needs to be carried out by June: the winter rye cover crop.
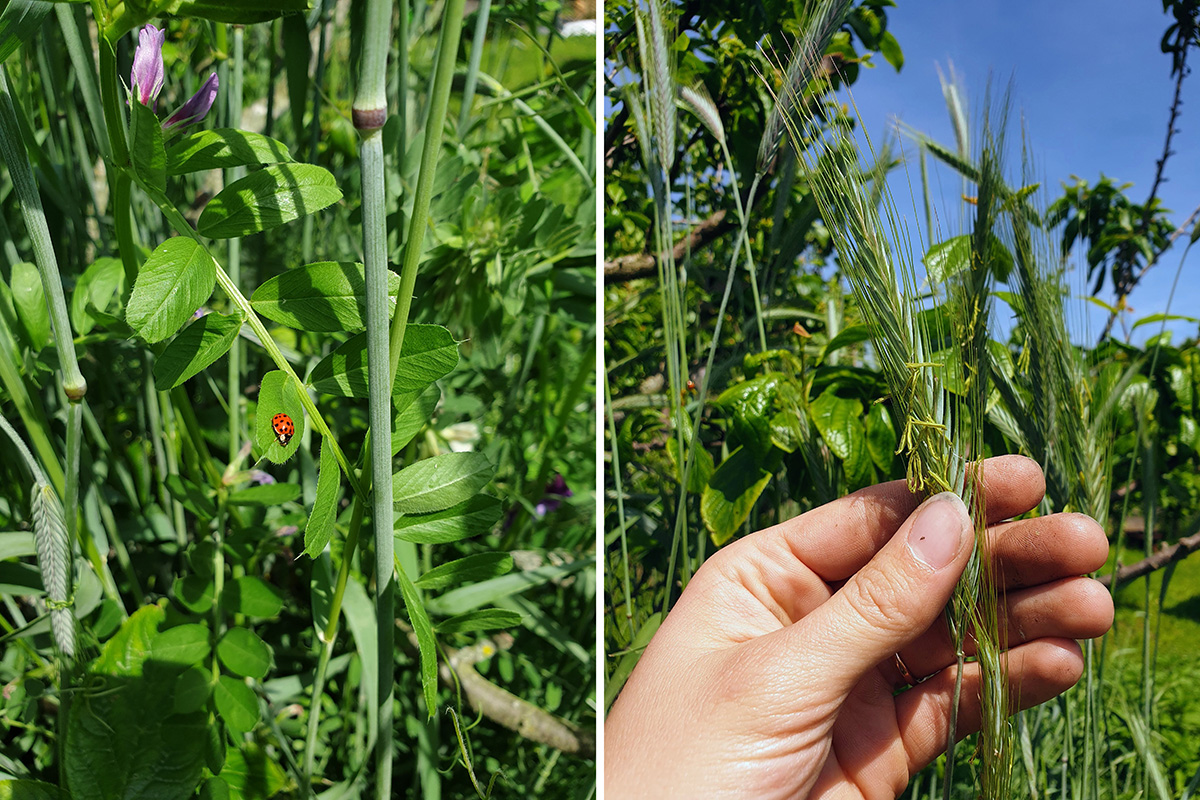
For the three sisters project—corn, beans and squash—we sowed a cover crop of winter rye Secale cereale and hairy vetch Vicia villosa in September 2019. Cover crops suppress weeds, protect the soil from the winter elements, and improve soil structure when chopped and dropped or rolled and crimped the following late spring. As a grass, winter rye usually grows back when you cut it, but it won’t if cut at a certain time, and this trait makes it an easy annual cover crop. And the time of the cut varies from year to year based on the weather.
How it works: the rye grows in the vegetative state from late summer to early spring. Then when daylength reaches 14 hours it’s triggered into the reproductive state of forming flower heads. Part way through seed maturity, during the milk stage, is the time to cut the rye. The ‘milk’ is the nutritious sap sent up from the roots and body of the plant; it’s the perfect time to cut because the movement of sap makes the plant think it has fulfilled its purpose producing the next generation. Cut the rye too early, the roots still have the nutrients and energy to grow vigorously in order to produce another seed head. Cut the rye too late, you lose the benefit of storing the nutrients from the decaying roots in the ground because all the nutrients will be in the seeds above ground and the seed might spread.
Left: Ladybug resting on a hairy vetch leaf that’s growing up a rye stock. Right: Maturing winter rye seed head.
Depending on how warm or cool the spring is depends on whether the chop and drop occurs in May or June, at least in our area; it is not done on a specific date in the year. Last year we chopped it in early to mid-June; this spring we’ve experienced some lovely almost early summer-like weather so the rye might need cutting in late May.
The maturing winter rye seed heads are also a wonderful indicator of warm temperatures and tell you, as a gardener, that it’s time to plant out the warm season crops such as the three sisters, tomatoes, peppers, sunflowers etc. I’m nervous about spreading the rye to the three neighboring plots. Once the milk stage begins, there is a 2-3 week window to cut the plant and if the German-Swiss border stays closed by mid or late June, I feel we will have a headache later in the year with the neighbors.
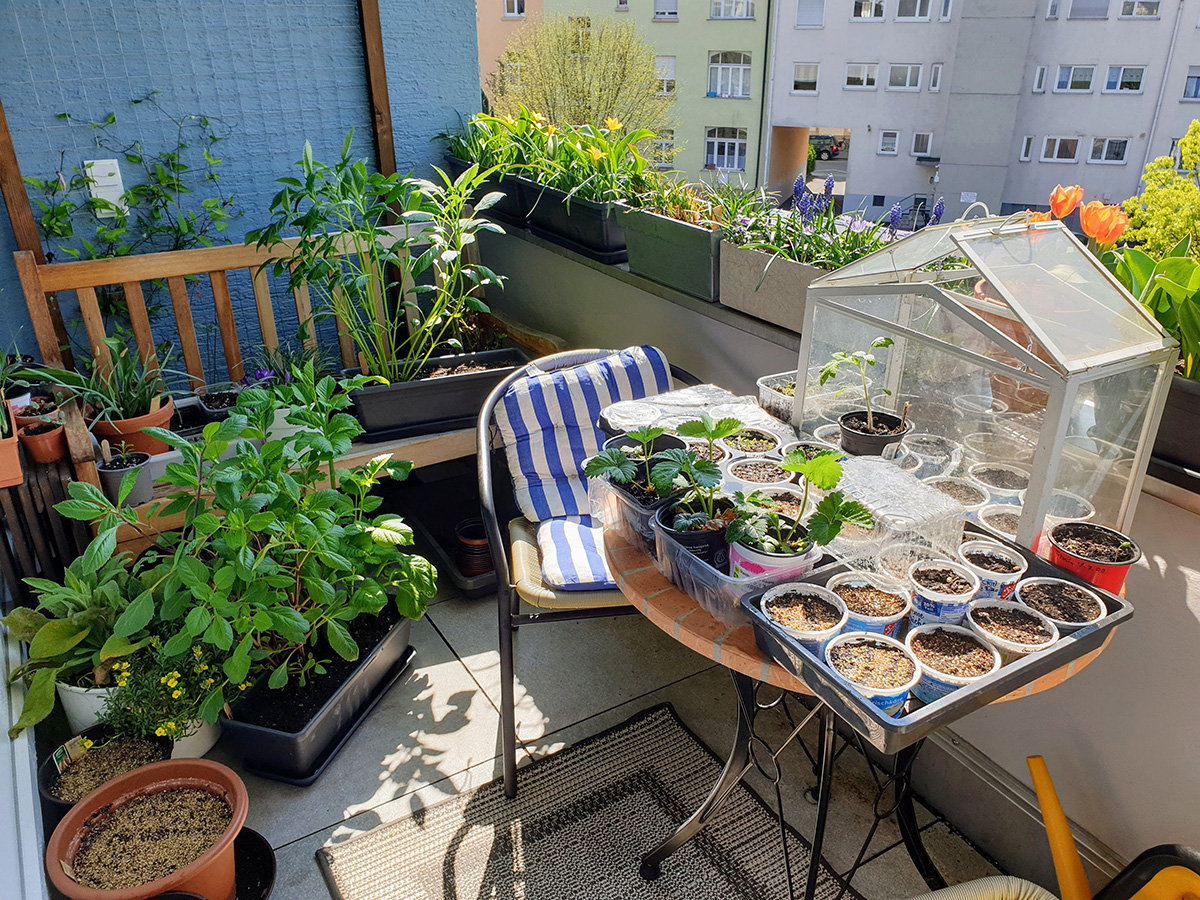
Though we haven’t been able to visit the Kleingarten, the Balkongarten has taken off! The flowering waves of Blumenzwiebel are a joy to observe now more than ever during these uncertain stressful times. The miniature irises and crocuses were a beautiful first act followed by the lightly scented grape hyacinths and anemones with the now grand finale of tulips. Behind the scenes of the spring bulb performance the herbs, leafy greens, and flower seedlings are germinating for their mid spring and summer debut.
Princess Irene tulips
This is my fourth year container gardening and second year seed growing, and so far there’s a noticeable improvement in my abilities, everything seems to be faring much better than previous years. The major change I’ve made is consistent fertilizing with liquid seaweed and adding a top dressing of worm compost to the pots. But I believe the biggest contributing factor to the improvement is the focus. My attention is not divided between the Balkongarten and Kleingarten at the moment, giving me more time to make mistakes, act quickly, observe, and learn from them. It’s also allowing me to accomplish tasks, such as potting on, at the correct time.
This year’s balcony plan was supposed to focus on herbs, leafy greens, and a few flowers but due to the circumstances I’m growing a tomatillo, a few tomatoes, carrots, and parsnips as well. In fact, because of the extra time at home, I thought of a way to squeeze more plants on the balcony by creating a string wall for the spring peas and summer beans to grow up. Will it be a problem to lose my focus growing a few vegetables on the balcony this year? Probably, but that’s the beauty of learning.
And with the extra plants comes the shrinking of space. I’m facing the small-space dilemma many gardeners are experiencing: not having enough room for all the seeds that were sown. This is not the worst problem to have, for the seedlings bring us joy and they are a way to spread joy to the community, which is needed at the moment. If you feel comfortable and have extra seedlings, set them on the street with a sign stating “free seedlings” or in my case “Setzlinge zu verschenken.” Be sure to wash the outside of your pots with a mild soapy mixture to prevent the spread of the virus, being careful not to get soap on the soil. Your seedlings will brighten someone’s day on their walk outside the home.
The Balkongarten packed with plants. I can’t wait until the spring bulbs die back so the herbs, tomatoes, and peppers can go into the balcony boxes.
It’s important during this time not to lose hope. We will get through this crisis and become stronger as a result. I hope you are staying safe and if you’re feeling stressed, remember that a garden, whether it’s a large plot of land or two pots on a windowsill, is there to help soothe an anxious mind.
The best and worst thing about gardening is the wait. In today’s world of instant gratification many would argue it’s always the worst, but gardening is more about observing and enjoying the process rather than the end result. Unfortunately, there are projects that are oh-so-difficult to wait for. I’ve been dreaming up a wildflower meadow project since May of last year, patiently waiting for autumn to arrive in order to start it. When it finally came, the garden crew and I completed phase one of building and I find myself eagerly awaiting phase two in the spring: emergence.
There are a few exciting questions I’d like to answer about this project:
Which of four different wildflower mixes will do best on the plot?
Which of two sowing methods will be most effective?
How will wildflower meadows look in a small space and will they actually be low maintenance?
What insects and other wildlife will the meadows attract and how will they change the ecosystem of the Kleingarten?
The two main reasons we sowed wildflower meadows in small areas are to increase wildlife and to reduce mowing in the least used spaces on the plot while keeping it aesthetically pleasing. There are many small, awkward, unused spaces within the garden serving no purpose other than being empty. We could potentially transform the areas into spaces for food production but unfortunately I know we won’t have the time to properly maintain them against the aggressive weeds. For the time being we needed a useful, low-maintenance solution for these challenging spaces, so why not attract beneficial insects and wildlife to the garden?
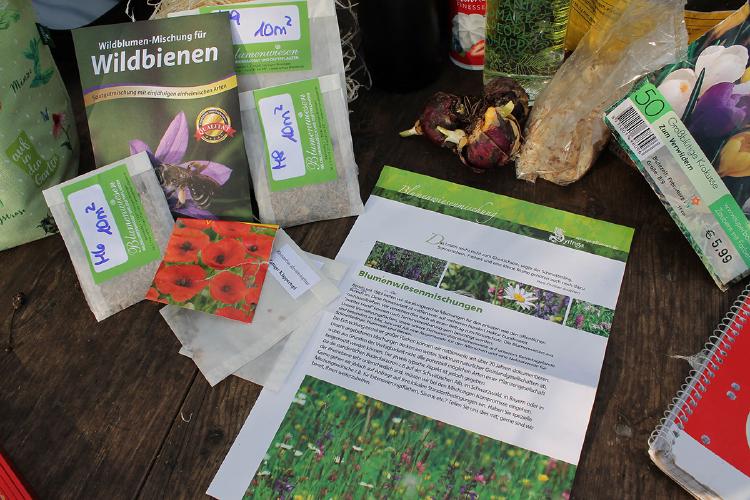
Info page from the nursery and packets of seed mixes.
I decided to order mixes from a local nursery not only to support the local economy but to also utilize their knowledge of what grows best within the region. The mixes were chosen based on the type of soil the allotment contains and the overall goal we’d like to accomplish. The nursery could even create a specialized mix based on our soil, sun, moisture, and whatever wildlife we’d like to attract but I opted out of this in order to test their pre-made mixtures. The ones chosen were a universal, half shade, walkable grass, and wildbee mix.
The universal contains a mixture of poor-dry soil type and rich-wet soil type wildflower seed. This mixture is used to take the guessing game out of what seed will succeed, since the conditions will select which type will survive. It’s a bit of an insurance policy—if you don’t care and just want a meadow, or you misrepresent your soil conditions—the seedlings best adapted to the conditions will survive. I predict the dry-sandy soil seedlings will be out-competed by the wet-clay seedlings, but I could be pleasantly surprised that a few of the dry varieties persist. This mixture should be a success no matter what.
Half shade was chosen for the sections of the garden that contain shade. Most of the seeds in this mix are generalists tolerating any soil type from sandy loam to heavy clay so it should be a successful mix as well, though the description online states we may not see many blooms until the second year. The full glory of a meadow can be a multi-year process.
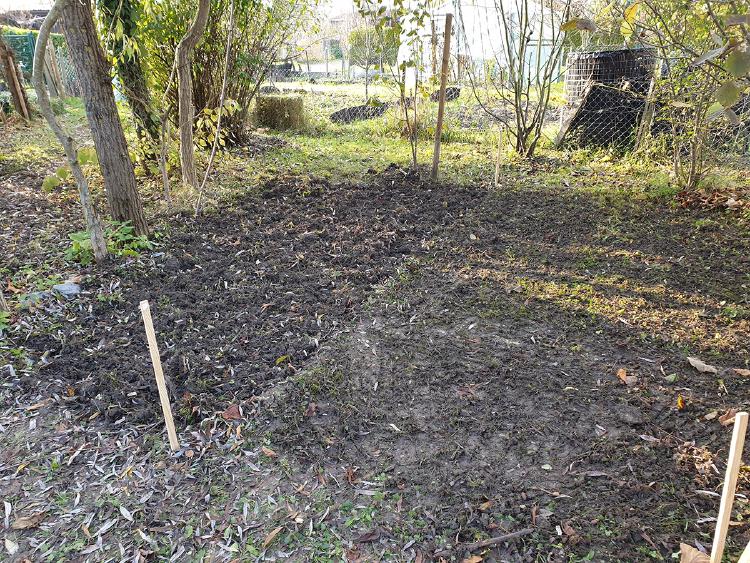
Half shade section marked out. Left is the break-up ground method; right is the soil scratching method.
The walkable grass contains multiple varieties of native grasses with a few wildflower species. The Kleingarten needs to be sown with some grass seed, since it is patchy with mud in heavily trafficked areas, so I chose this for its function as a pathway as well as a food source for native insects and wildlife. This mix’s description states it can be mowed more often, handle trampling, and recover quicker compared to a traditional meadow. If it’s successful against foot traffic, then this autumn the garden crew will help sow more grassy pathways throughout.
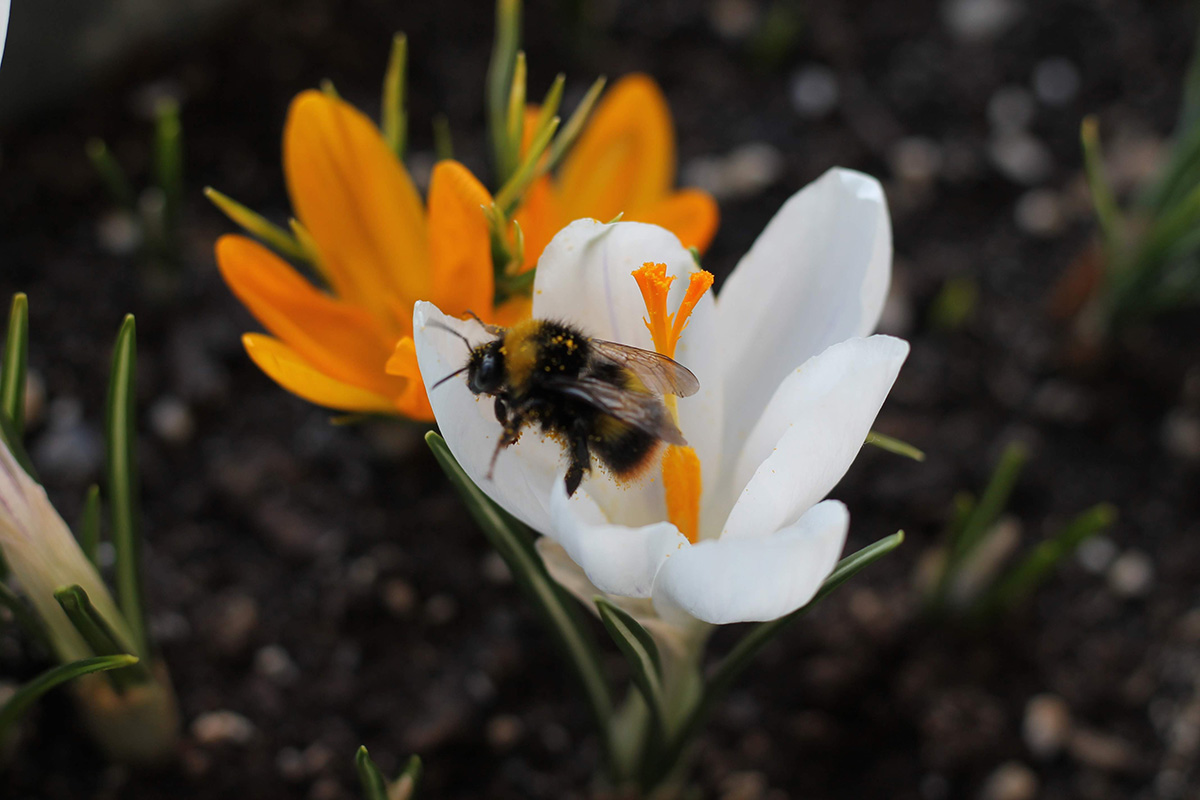
The last mix chosen was a wild bee mix. The nursery’s website stated that it was created in collaboration with a wild bee expert to take into account the nectar and pollen production required for bees to raise healthy brood. It’s also designed to attract multiple species of bees including silk bees, fur bees, mason bees, carpenter bees, bumblebees etc. without containing invasive species of plants. I really hope this mix is successful, though I have the feeling it will not thrive as well as the others since many of the plant species listed prefer sandy or well-draining soil. But the success of any mix is better than nothing: even if this particular mix does not survive, many bee species will still benefit from the other three types sown.
Wild bee mix packet with universal mix packet and red poppies packet in foreground. I added a few poppy seeds to the universal mix for fun.
This project also compares which of two sowing methods will be effective. Each seed packet was for 10m2 (107ft2). We roughly divided the 10m2 plots in half for each method (see half shade photo above), one hardworking method of removing sod and breaking up the ground, as recommended by the nursery’s instructions, and the other easier method of soil scratching with rakes. Soil scratching involves a few extra steps of mowing the area as short as possible, almost scalping it, then vigorously scratching the surface in a few directions with a sturdy leaf rake, then repeat the scratching in different directions with a bow rake to cut a little deeper into the ground. The goal with this technique is to weaken the grass roots without the slow backbreaking method of completely removing the sod. I have the feeling that the harder method of removing and breaking up grass will win, especially since the lawn mower is so old we couldn’t lower the deck to complete the first step of cutting the grass short for the scratching method. We did, however, add some Yellow Rattle seed to the universal and wild bee mixes to help the wildflowers compete against the grass. I only added it to two mixes because I didn’t have enough seed for all four.
Yellow Rattle is a semi-parasitic species that feeds on grass roots effectively weakening the grass to create spaces for wildflowers to grow. It’s known as the “meadow maker” and is called Yellow Rattle for the rattling sound the mature seeds make within the pods; the German name is pretty adorable too: Kleiner Klappertopf- little rattling pot.
After preparing the areas with each method, we mixed the seed with some sand to allow for even distribution and to see where we had sown since the seeds blend with the ground. Finally we took a few pieces of scrap wood, laid them over the sown areas and walked on them to press the seed into the ground for good soil contact. If your soil is dry you can lightly tread the seed with your shoes but our soil was wet and sticky on those days so we didn’t want to risk re-collecting the seeds with our boots.
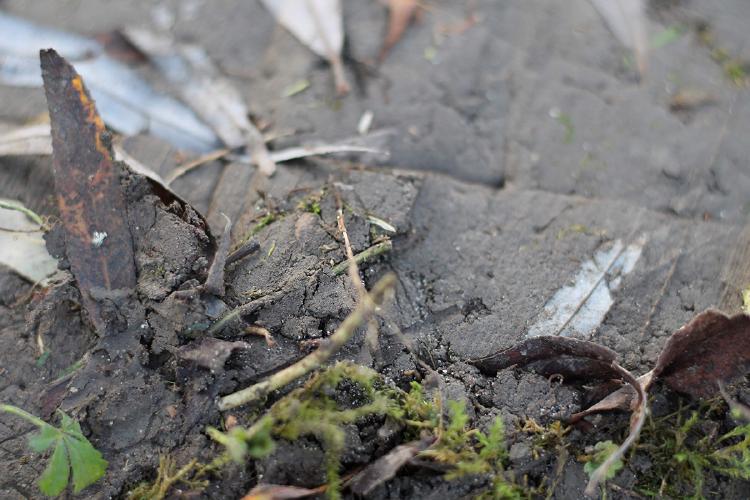
Can you spot the pressed-in seed in the center?
There is an easier third method that is probably the most effective but requires time. Lay out a large black or dark colored tarp, which no light can penetrate, over the area and place heavy bricks in the middle and around the edges. Leave for five months, best a year, to kill and break down the grass. It’s important to pull the tarp fairly tight and place the heavy objects at regularly spaced intervals so the wind does not catch it and expose the plants or weed seeds to light and air.
The third thing I am interested in is seeing how wildflower meadows look in a small space and if they really are low maintenance. Most meadows I’ve seen are in vast open areas. There are a few beautiful ones nearby that are more than an acre and I am curious to see how they look and cope in a small fruit orchard allotment garden. It’s my hope that they’ll look great, be as low maintenance as they claim, and inspire someone to add a small meadow in their garden or backyard in order to help native wildlife.
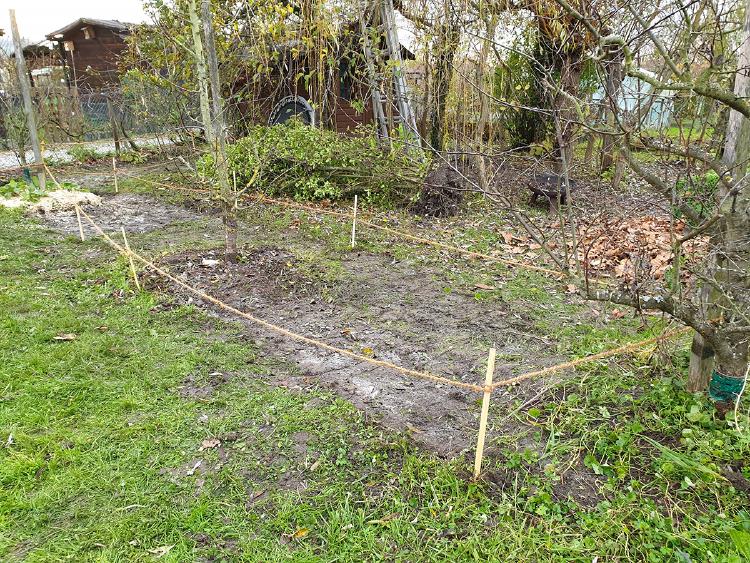
The beginning stage of meadow building is not the prettiest but will hopefully pay off this season. The wild bee mix was sown between the right and middle tree; the universal mix was sown between the middle and far left tree.
The final and most exciting thing I’m interested in, what new insects and wildlife will we see next year? To be honest, I have the typical reaction towards insects: I hate when they fly around or are on me. I’ve always loved spotting them move about the garden but as soon as they take off toward me, they freak me out. I appreciate the hard work they do in our gardens of breaking down dead organic matter, improving soil fertility, pollinating our plants, and yes, even eating our plants, because those ‘pests’ we love to hate attract useful predators. And the more I’ve learned about honeybees, the more comfortable I’m becoming with insects in general. As long as they are not physically on me, I love them.
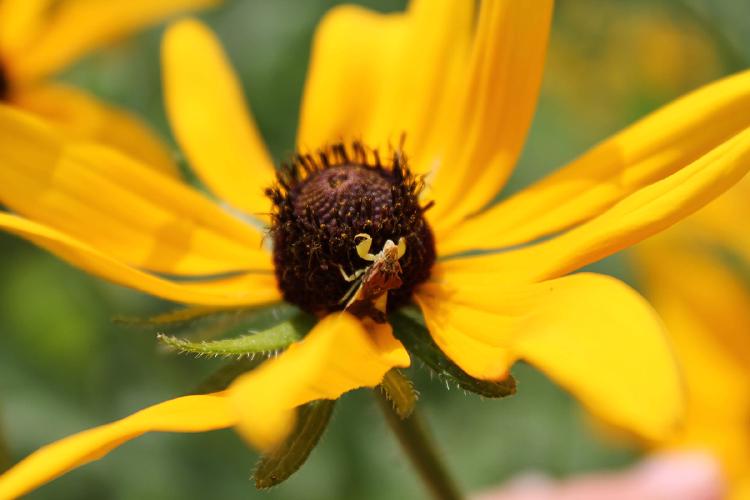
Love watching this guy posed on a black-eyed susan. If you know what insect this is, let me know on Twitter! @hereisthedill (Photo taken in Ohio garden)
There are so many fun interesting things about this project that I’ve never been more excited for spring to come. I will say I am worried that I’m getting my hopes up too much. The grass and weeds of this allotment are aggressive and if there’s one thing I’ve learned is not to set such high hopes for this space. I’ll consider it a success if we can get just a few wildflowers to stay in the battle against the weeds.