While so much has changed over the past year, one thing that changed for me in the garden realm was giving up a balcony. In the autumn, my husband and I moved into a new apartment and although we thought we would not give up a balcony, we ended up falling in love with the space and decided to compromise. Luckily, all is not completely lost when it comes to indoor and outdoor growing space in the new place. I can’t wait to share with you the new projects and challenges to come, but in the meantime, let’s review the highlights of the Balkongarten this past year.
Winter
It might seem odd to start with winter, but winter is the preparation for the following growing season. I planted spring bulbs in containers relatively late, in December 2019, a task normally completed in September-November, but time got the better of me during the last months of 2019, to the point where I almost didn’t plant them. I’m so glad I did because they were a sliver of joy for myself during the stressful spring. This winter I’m pushing the boundaries with spring bulbs, having potted up one container in our new place in mid-January 2021 and stowed it away in our new attic space until I can get the next project started: where they will eventually live outside, their new home on the windowsills! (but that’s a later article). If the attic doesn’t get cold enough, there might not be any blooms this year but that’s the fun with experimentation: you won’t know until you try!
A tip for planting bulbs in containers:
Pre-moisten the potting mix before beginning. I was lazy in December 2019 and used a potting mix straight from the bag, then watered from above/soaked from below. The potting mix repelled the water and went straight through the container without much absorption. This is especially common with potting mixes that are compacted with less weight or made with coconut coir. By the end of December I ended up having to unpot the bulbs and agitate the mix with my hand while watering to finally get it to absorb. Save yourself the time and pre-moisten the mix before you begin filling containers.
Header: Balkongarten in March 2020. Here: Crocus bulbs planted in early Dec. 2019.
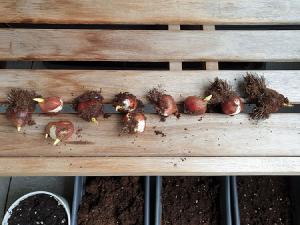
Tulip bulbs with some root formation in late December 2019 when I redid the containers.
A new lesson learned
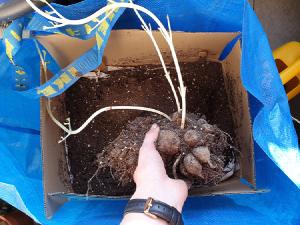
One major thing I learned over the winter is that if you store dahlia tubers, or Dahlieknollen, they need to be stored below 10ºC (50ºF). Winter 2019-2020 was my first attempt to store tubers, and it was successful…in a way.
I used a cardboard box, placed the tubers inside, filled it with an old, lightly-moistened potting mix, then tucked it away in the building basement. Now, this wasn’t a fully underground basement in American terms but a half underground basement, which helps create what’s called a Hochparterre in German terms. A Hochparterre means the ground-level apartments are not actually located directly on the ground but a half level up since no one wants to live directly at street level for fear of break-ins, though I’d argue the neighborhood watch helps prevent that (I’m looking at you alte Frauen).
While checking the box’s moisture level in February I found the tubers had sprouted long ghostly stalks, presumably searching for light. This is when I learned that the half-underground basement of the building was not cold enough to keep the tubers dormant over winter.
Dahlia tubers in February 2020.
Dahlia tubers should be stored between 4º-10ºC (39º-50ºF). Since I didn’t have access to a cooler spot that was not the freezing temperatures outside, I potted them up in February and placed them next to the windows inside our living room. I had never really appreciated how fast dahlias grow, as they proceeded to take over space in our living room until they were placed outside after the last frost in April. They first bloomed in May; typical bloom time begins in July! It was a good insight into how some commercial growers may manipulate flower bloom times through temperature adjustments. At the end of the year, I might try storing dahlia tubers again in our new attic space, which is significantly chillier than the basement of the previous building.
Spring
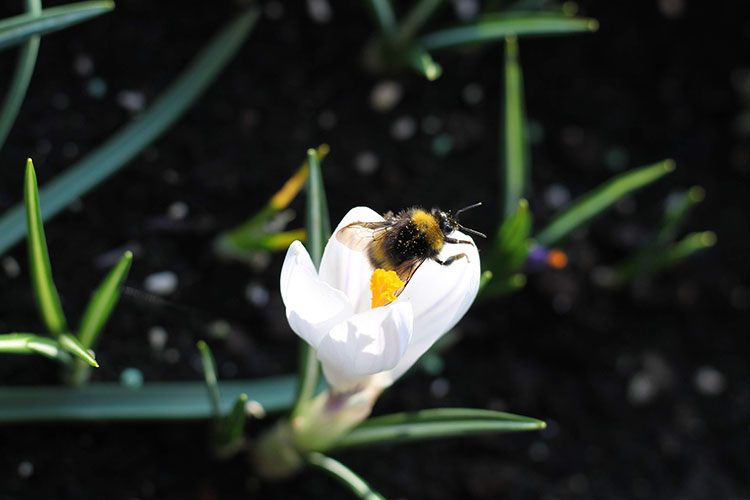
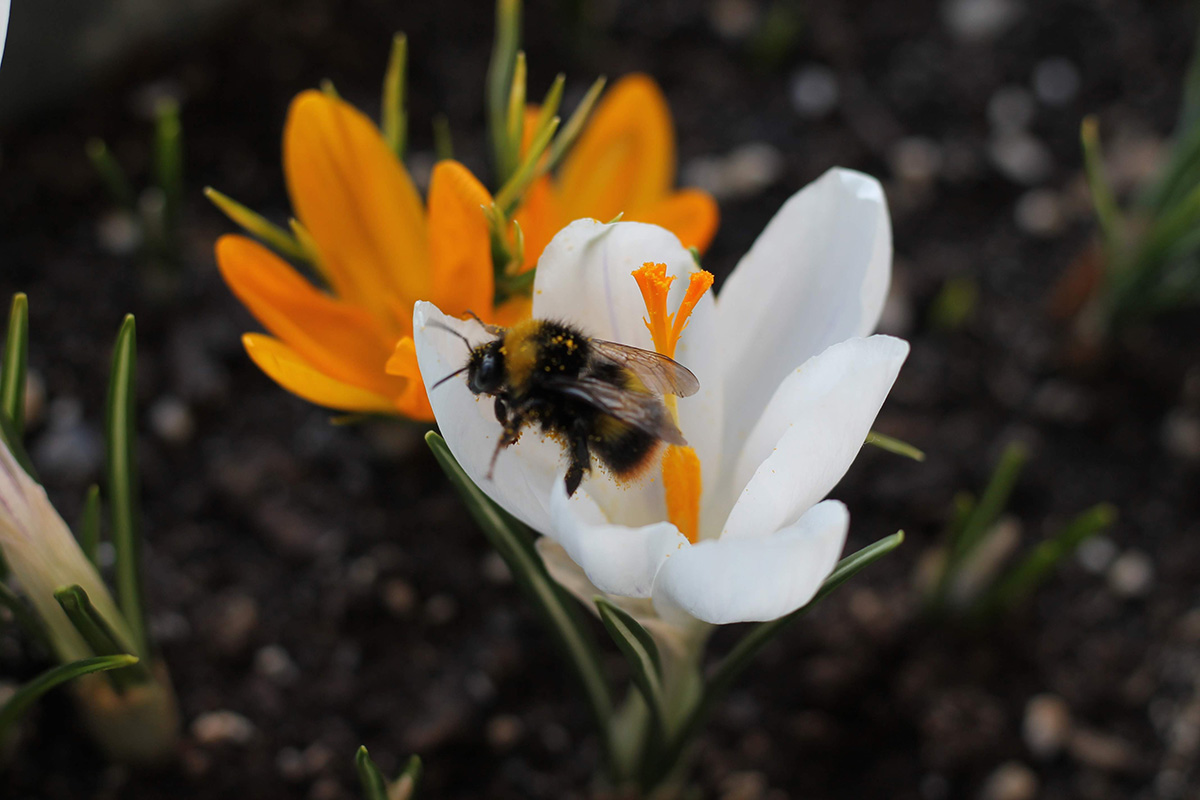
Bumblebee collecting food from a crocus after her winter hibernation.
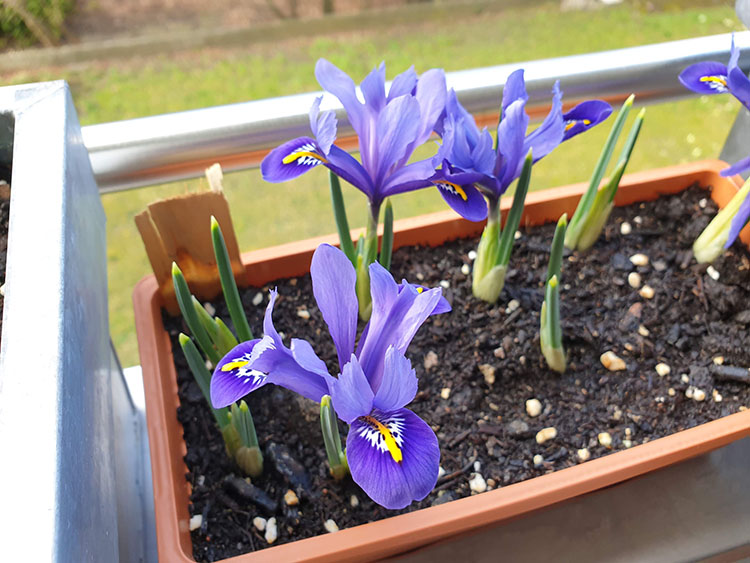
Warmer weather arrived in March and with it came the first crocus and miniature iris blooms. This was when the WHO declared Covid-19 a pandemic and it was at this time that I really appreciated the Balkongarten. It was the only place where I could take my mind off the current events, watching the crocuses open and close as clouds float by and bumblebees collect nectar from blooms provided some much needed meditation during the chaos.
I highly recommend mini irises for spring bulb containers. They require a small amount of space and provide a huge pop of color to the early spring brown monochrome.
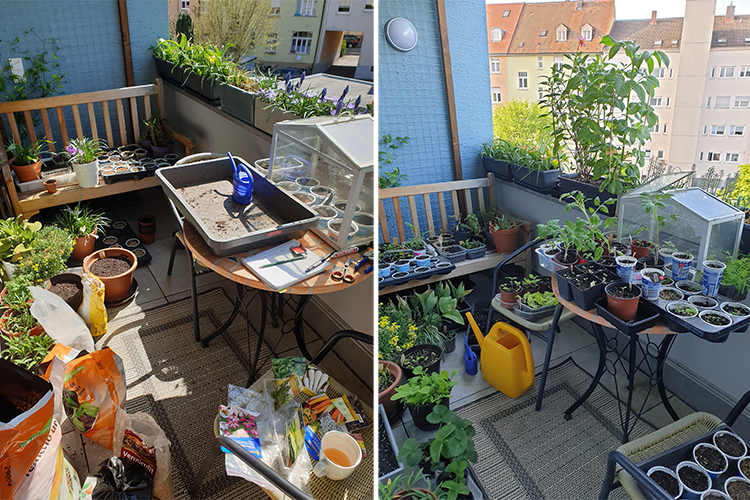
April arrived when a different and good kind of chaos brewed, seed sowing! I told myself last season that I would dial back on the balcony, focusing more on herbs and flowers in 2020. As you can tell from the photos below, that went out the window. The borders were closed, meaning there was no access to the Kleingarten just 200m (660ft) over it, and who was I to miss out on growing vegetables that season? And, as a fellow plant lover on Instagram commented, “who needs to sit anyway?” It turned out to be a fun experience, learning how to grow a few new vegetables in containers even if they didn’t turn out perfectly, but more on that later.
The beautiful chaos of spring seed sowing
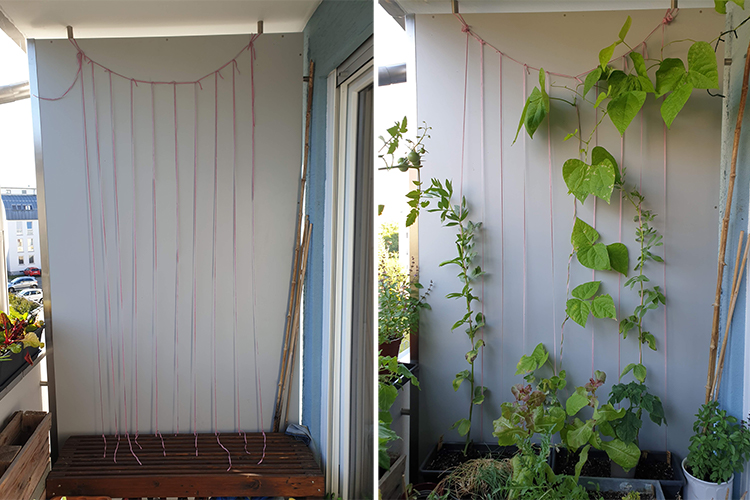
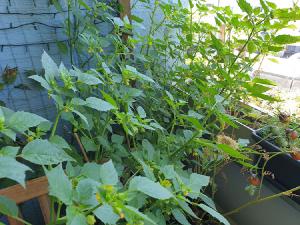
Two new vegetables on the balcony were peas and beans. Being stuck at home meant more time to figure out how to fit more plants on the balcony. I pictured the side wall would turn into a Naschgärtchen with lush green vines of vegetables to snack on, and while it was a minor success with a few peas and beans to harvest, unfortunately the Balkongarten did not receive enough full sunlight in this area throughout the day. Despite it facing south, the ceiling blocked some hours of potential sunlight, and only plants on the ledge received a full day’s worth of sun. I had trouble getting the pea and bean seeds to sprout because the container stayed too cool. Makeshift cloches helped a little but it would have been better to set the boxes on the sunny ledge until the seeds germinated. I’m still happy with the experiment and what didn’t work for me might work for you, so here’s a quick breakdown of what I did:
Naschgärtchen Projekt
I used some old ribbon yarn for the structure, tied some knots across the top horizontal strip to hold the vertical strands in place then wrapped the vertical strands around one of the wood planks on the bench to anchor it. I would recommend using a stronger string or rope in case you have better luck than I did to hold the weight of the plants. The potential load-bearing limit didn’t come to mind until after everything was hung up, though fortunately/unfortunately I didn’t grow enough plant mass for it to become an issue.
Pea and bean wall in April and July
By mid-April the tulips, anemones and grape hyacinths were at their peak and buzzing with activity from various bee species.
Can you spot the honeybee hopping between grape hyacinths?
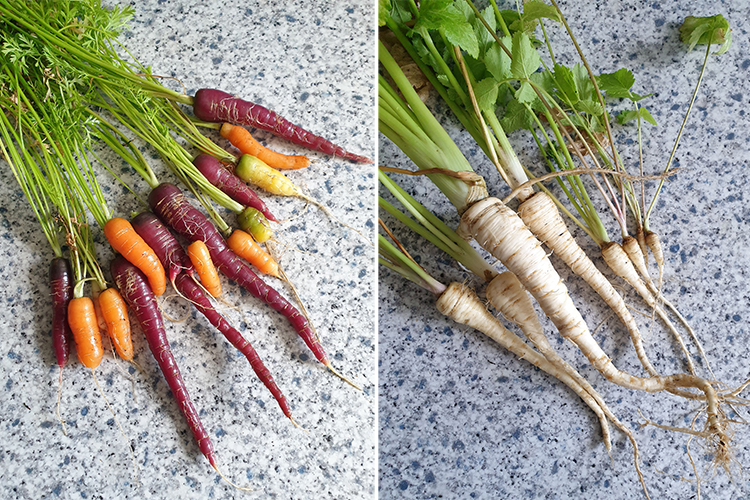
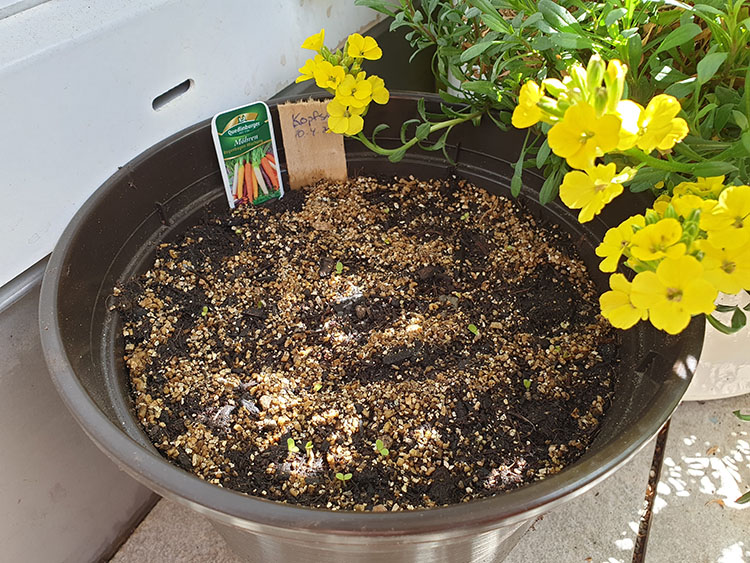
Another experiment was a few polyculture pots. I created one container with carrot and lettuce seed and another container with parsnip and spinach seed. I used the lettuce and spinach as mini greens while waiting on the carrots and parsnip seeds to germinate. It would have been best to thin out the lettuce and spinach to just 2-3 plants instead of 10 for the size of pots that I used (or, you know, use larger pots), but overall I was happy and harvested a few carrots and parsnips by the end of summer.
Carrot and Parsnip harvest in September, small but still delicious. The roots might have bulked up had I been more on top of watering throughout the season.
Carrot and lettuce polyculture container.
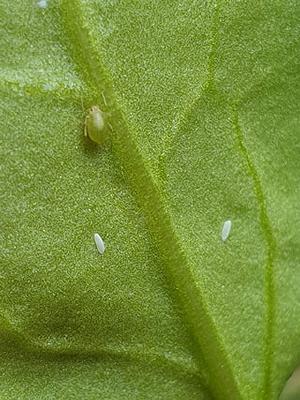
Two white leafminer eggs with a green aphid for size comparison.
A New Pest
Growing the spinach in cramped, less-than-ideal conditions attracted a new unfamiliar pest: leafminers. They can be found burrowing between the upper and lower leaf epidermis of leaves. Luckily, they are easy to spot in the leaf during the larva stage and can easily be cut out, but the damage will have already been done. To spot the problem beforehand, check the underside of leaves for tiny white eggs and gently scrape them off with your fingernail to crush them with your fingers.
As you can tell from the above photo I also had a familiar foe: aphids. I resisted the urge to use neem oil to attract the familiar ladybug predator which paid off because I also attracted the less familiar hoverfly and parasitic wasp predators. As much as I don’t want to watch my plants grow weak from pests, I really do enjoy watching aphid predators, which is why I tolerate the aphids. I mean, you’ve got to admit watching this hoverfly larvae eat an aphid is pretty cool, and so is watching the parasitic wasp hunt for aphids.
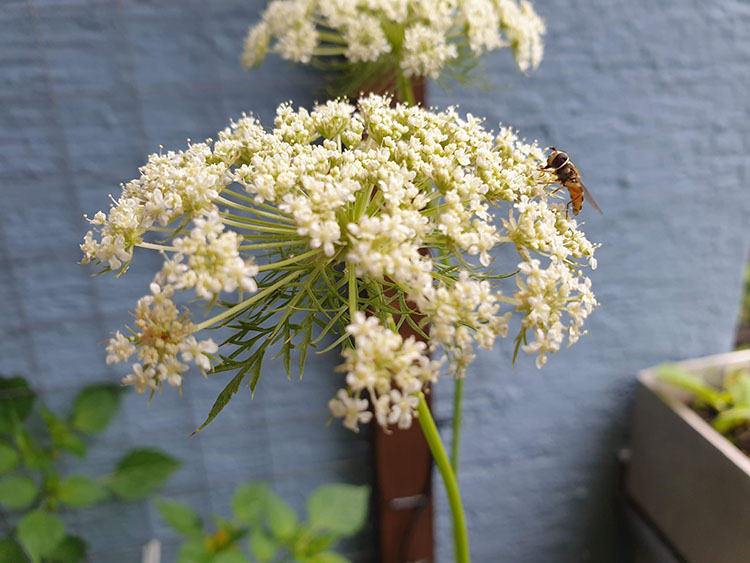
I also really enjoy the adult hoverfly behavior, swaying from left to right in a sharp zig-zag manner, sometimes abruptly hovering for several seconds to inspect whether I was a friend or foe, as they searched for plants to lay eggs. The hoverflies most likely wouldn’t have arrived if it weren’t for the shallow-faced flowers of wild carrot, dill, and alyssum on the balcony, so if you wish to attract these curious little flyers be sure to have one of these flowers around as a nectar source for the adults.
An adult hoverfly sipping nectar from a wild carrot Daucus carota flower.
Summer
By June I hung some lights and planted a few brightly-colored flowers to add some festivity to the space. The flowers attracted more pollinators to watch during the day, while the lights gave the warm evenings of sipping wine a nice glow.
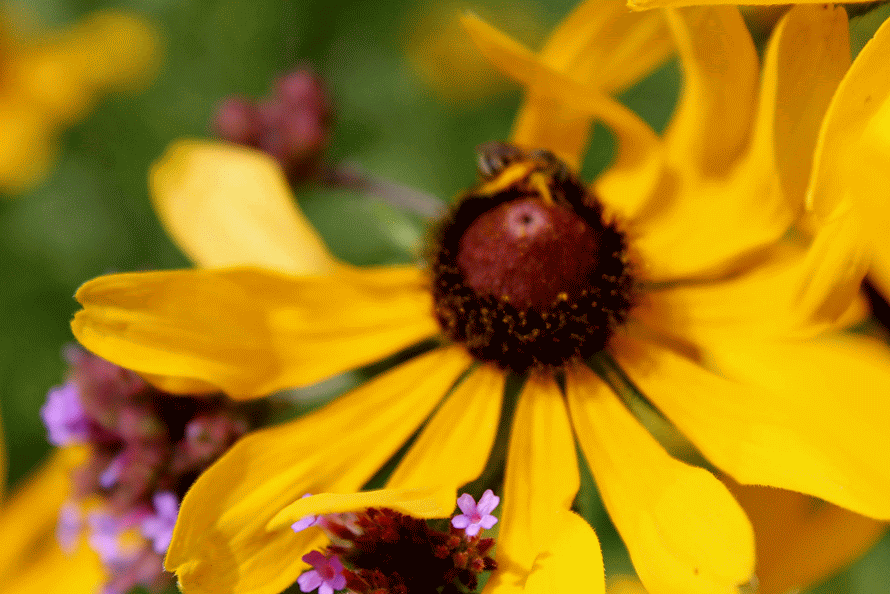
Honeybee on Goldmarie ‘Beedance’ Bidens ferulifolia.
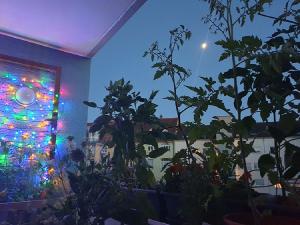
Enjoying the night peering through the tomato plants as June’s full moon rises.
Enjoying the night peering through the tomato plants as June’s full moon rises.
August arrived when many plants were looking less than stellar from the summer heat but I didn’t mind because it was still a place of refuge. If we were still living there I would try setting up an irrigation system. As I’ve stated in a past post, my least-favorite garden activity is watering, and though I watered at least twice a day it didn’t seem to be enough. I think the plants in this space would have prefered a slow, steady drip for 1-2 hours twice a day for a more even distribution of moisture throughout the day.
One of the few plants that loved the heat was the tomatillo. It was huge! I got a lot of flowers but not many tomatillos themselves, though that was due to laziness of not collecting pollen from a friend’s tomatillo plant. Tomatillos are not good self-pollinators and require at least one other plant for cross pollinating. On my plant with more than 100 flowers and I received maybe 10 small tomatillos. They are very large, prolific plants so I do not recommend growing them on a small balcony, and since they do grow large they will require support. In the sheltered corner of the balcony I tied the main stem to a wire trellis. If you have a large balcony, and one that is large enough for two plants, then definitely give them a try.
Autumn
Autumn arrived and it was time to pack the apartment, harvest the last summer tomatoes, and clean the balcony. We were ready to move but it was bittersweet leaving the balcony behind. I learned a lot about container gardening in this space and still have a lot more to learn about it. Thankfully, I can continue to learn in the new apartment though it will be a little different, but I’ll get to that in a future post. We still live near the Kleingarten so there will still be plenty to learn and do there but until then I say farewell, Balkongarten, you were a great teacher.
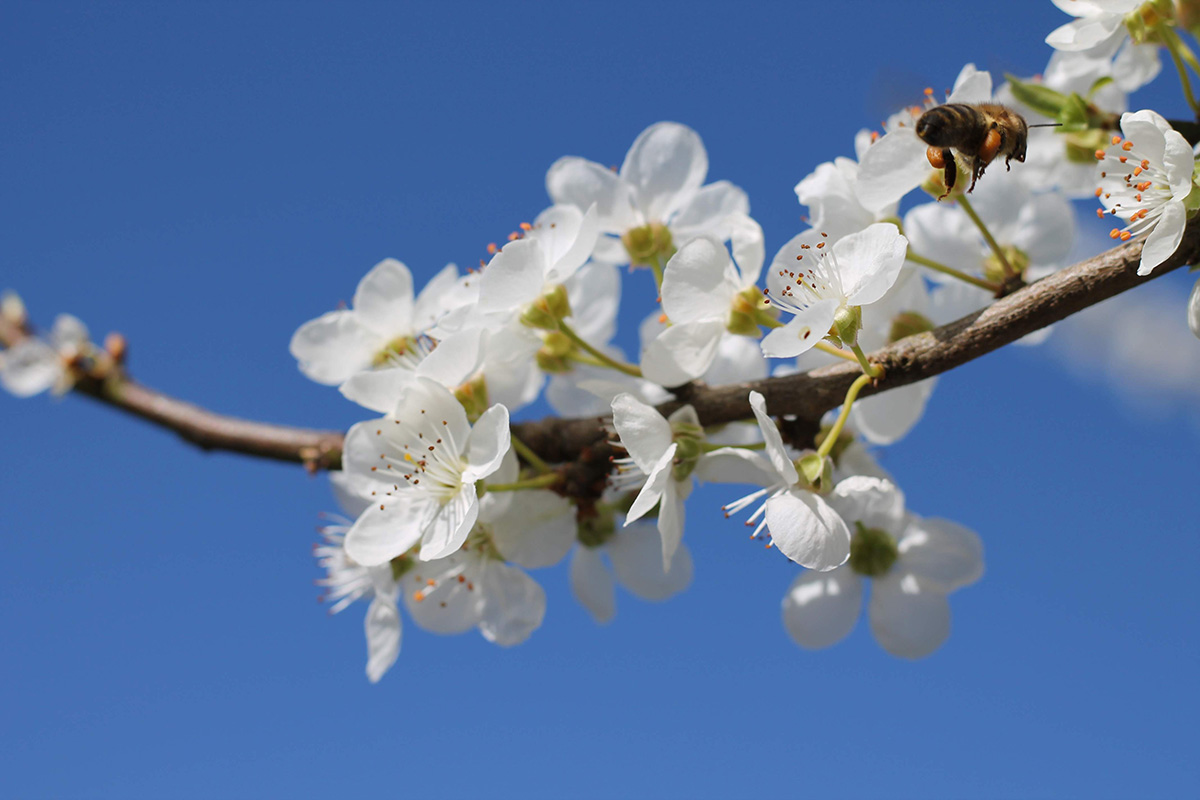
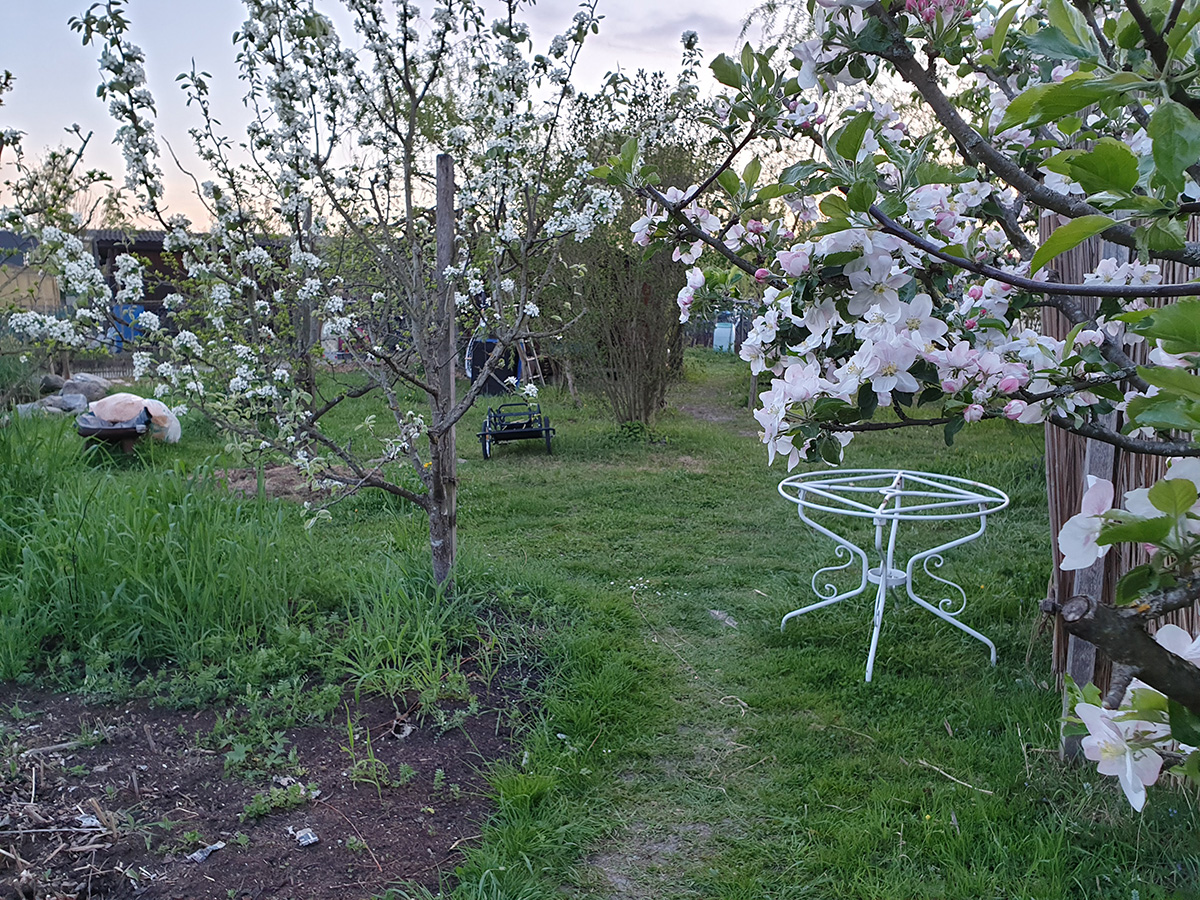
It’s been one month since Germany closed its borders to neighboring countries, one month since we’ve been able to visit the Kleingarten located only 200m (660ft) in Switzerland. It’s a little sad not being able to observe the garden transition into spring. Around this time of year the fruit trees are blooming and it’s the perfect time to celebrate spring by cooking food over a fire. We were lucky enough to enjoy a small picnic, with proper social distancing of course, under the flowering plum tree the day before the closing.
Header: Honeybee collecting pollen from plum tree. The tree was buzzing with activity all day. Here: Fruit trees blooming in the Kleingarten April 2019. The bushy growth on the left was the 2019 winter rye and hairy vetch cover crop.
When we left, the onions and raspberry brushes were awakening from their wintery slumber and we noticed the tiniest of seedlings popping out of the prepared meadow areas from the fall. They were so small that it was undetermined whether they were in fact the meadow seedlings or weeds, though I have the sneaking suspicion that the birds might have helped themselves to the seeds over winter. If we had access to the garden to see if they are weeds, we could have cheated and sowed another round of the mixes and protected them from the birds with a thin layer of fleece until germination.
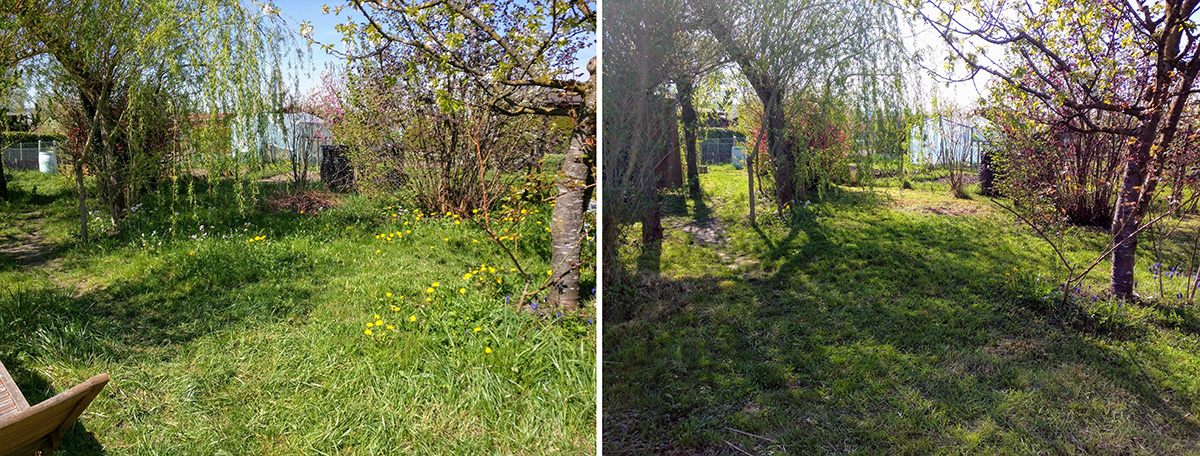
The garden probably looks a bit rough at the moment with overgrown grass, but we enjoy its wild look and in the past have even put off mowing a few extra days to enjoy the casual nature of the space. Before the border closing, Dan, a member of the Schrebergartencrew, sowed peas, carrots, cilantro, spring onions, spinach, and potatoes, of which the carrots and peas had already begun sprouting.
Before and after mowing April 2018
I’m confident the vegetable seedlings will do well in our absence, so long as the slugs show some mercy; I am slightly concerned about the meadows sown last fall, as they are supposed to be mowed by mid-May for the success of the project. It would be a shame to see the hard work from the garden crew go to waste, but there is a more concerning issue that needs to be carried out by June: the winter rye cover crop.
For the three sisters project—corn, beans and squash—we sowed a cover crop of winter rye Secale cereale and hairy vetch Vicia villosa in September 2019. Cover crops suppress weeds, protect the soil from the winter elements, and improve soil structure when chopped and dropped or rolled and crimped the following late spring. As a grass, winter rye usually grows back when you cut it, but it won’t if cut at a certain time, and this trait makes it an easy annual cover crop. And the time of the cut varies from year to year based on the weather.
How it works: the rye grows in the vegetative state from late summer to early spring. Then when daylength reaches 14 hours it’s triggered into the reproductive state of forming flower heads. Part way through seed maturity, during the milk stage, is the time to cut the rye. The ‘milk’ is the nutritious sap sent up from the roots and body of the plant; it’s the perfect time to cut because the movement of sap makes the plant think it has fulfilled its purpose producing the next generation. Cut the rye too early, the roots still have the nutrients and energy to grow vigorously in order to produce another seed head. Cut the rye too late, you lose the benefit of storing the nutrients from the decaying roots in the ground because all the nutrients will be in the seeds above ground and the seed might spread.
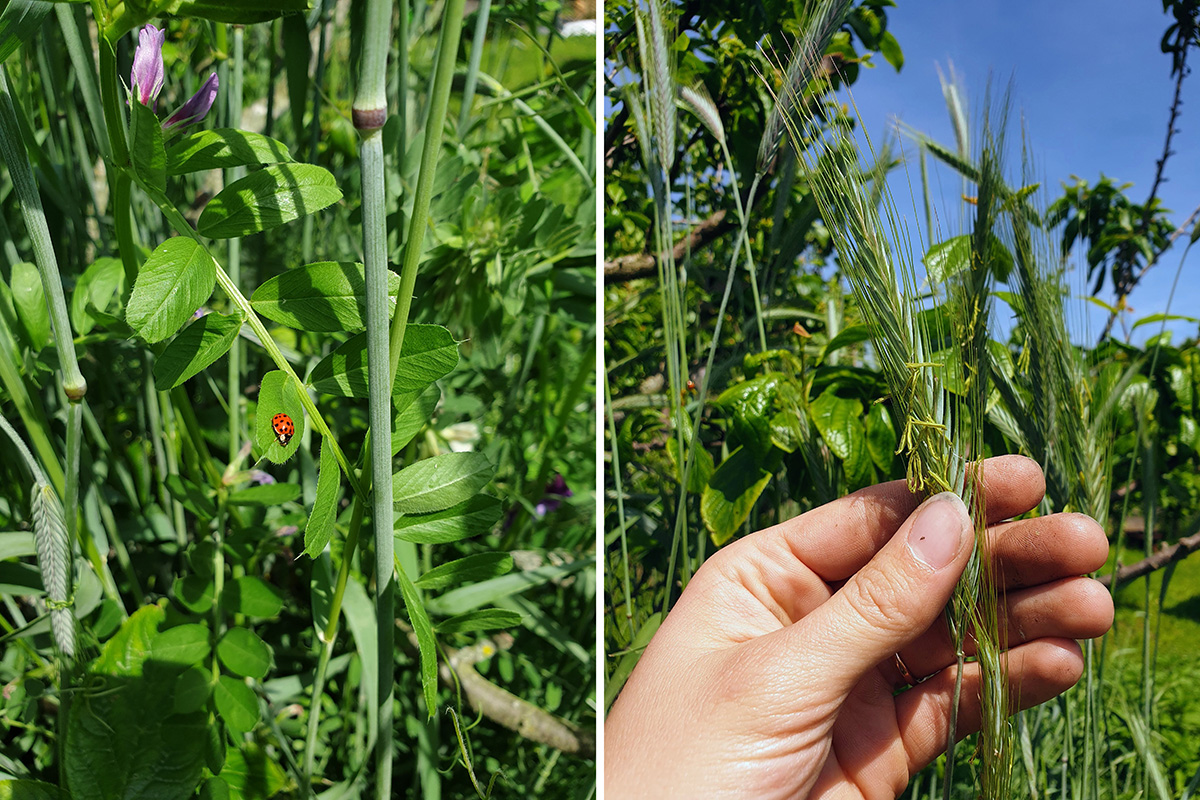
Left: Ladybug resting on a hairy vetch leaf that’s growing up a rye stock. Right: Maturing winter rye seed head.
Depending on how warm or cool the spring is depends on whether the chop and drop occurs in May or June, at least in our area; it is not done on a specific date in the year. Last year we chopped it in early to mid-June; this spring we’ve experienced some lovely almost early summer-like weather so the rye might need cutting in late May.
The maturing winter rye seed heads are also a wonderful indicator of warm temperatures and tell you, as a gardener, that it’s time to plant out the warm season crops such as the three sisters, tomatoes, peppers, sunflowers etc. I’m nervous about spreading the rye to the three neighboring plots. Once the milk stage begins, there is a 2-3 week window to cut the plant and if the German-Swiss border stays closed by mid or late June, I feel we will have a headache later in the year with the neighbors.
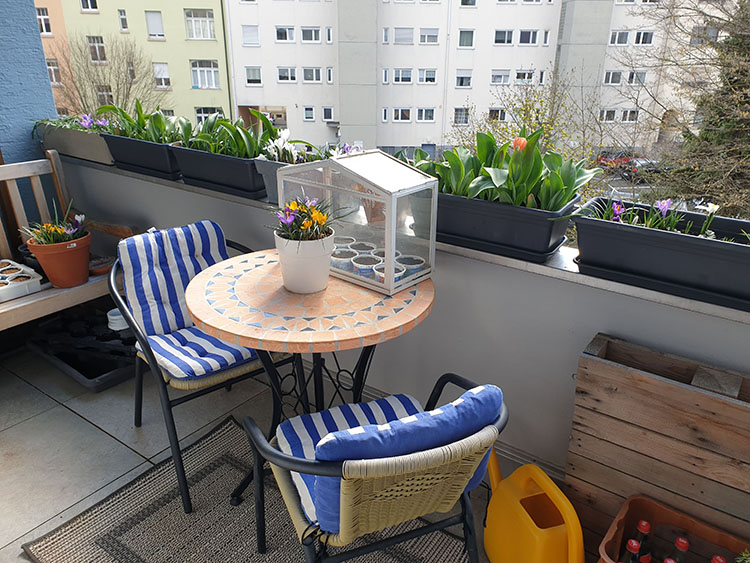
Though we haven’t been able to visit the Kleingarten, the Balkongarten has taken off! The flowering waves of Blumenzwiebel are a joy to observe now more than ever during these uncertain stressful times. The miniature irises and crocuses were a beautiful first act followed by the lightly scented grape hyacinths and anemones with the now grand finale of tulips. Behind the scenes of the spring bulb performance the herbs, leafy greens, and flower seedlings are germinating for their mid spring and summer debut.
Princess Irene tulips
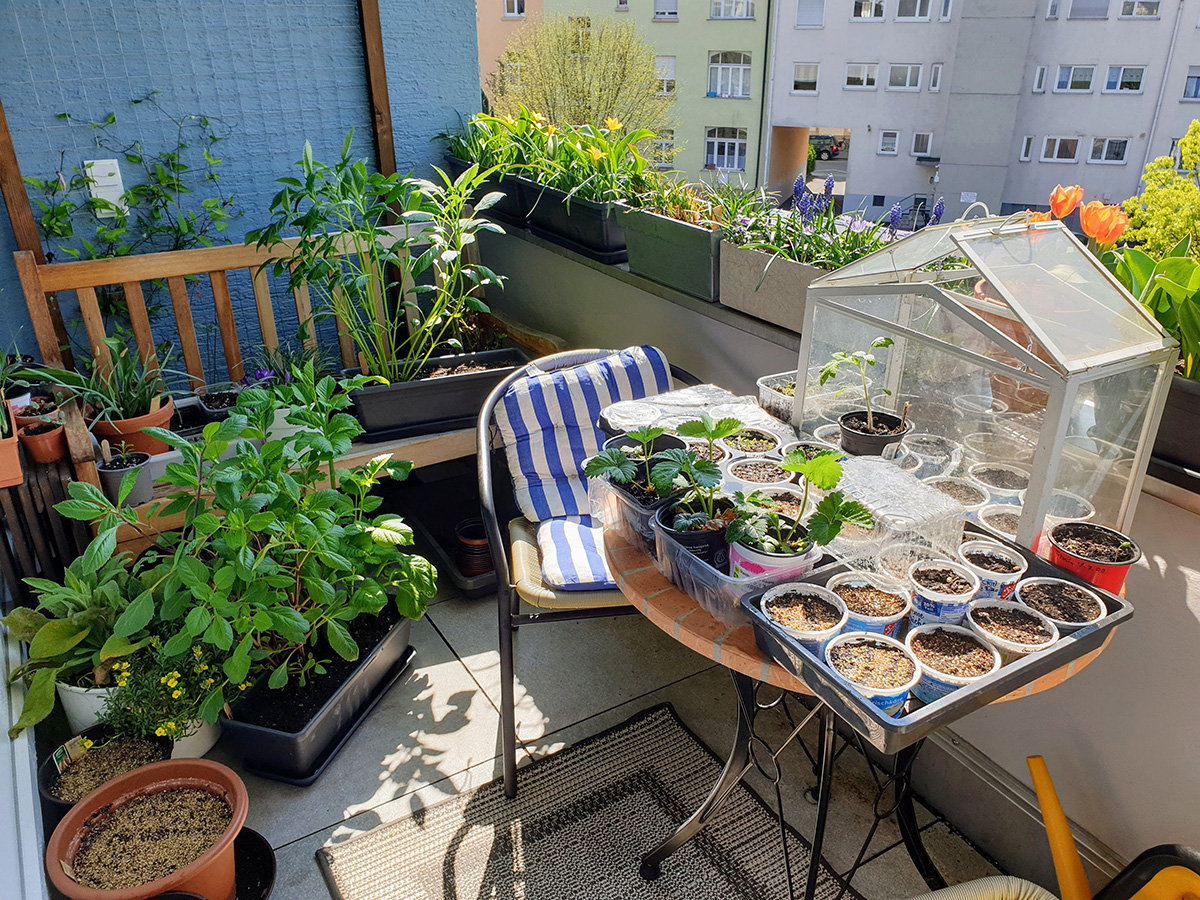
This is my fourth year container gardening and second year seed growing, and so far there’s a noticeable improvement in my abilities, everything seems to be faring much better than previous years. The major change I’ve made is consistent fertilizing with liquid seaweed and adding a top dressing of worm compost to the pots. But I believe the biggest contributing factor to the improvement is the focus. My attention is not divided between the Balkongarten and Kleingarten at the moment, giving me more time to make mistakes, act quickly, observe, and learn from them. It’s also allowing me to accomplish tasks, such as potting on, at the correct time.
This year’s balcony plan was supposed to focus on herbs, leafy greens, and a few flowers but due to the circumstances I’m growing a tomatillo, a few tomatoes, carrots, and parsnips as well. In fact, because of the extra time at home, I thought of a way to squeeze more plants on the balcony by creating a string wall for the spring peas and summer beans to grow up. Will it be a problem to lose my focus growing a few vegetables on the balcony this year? Probably, but that’s the beauty of learning.
And with the extra plants comes the shrinking of space. I’m facing the small-space dilemma many gardeners are experiencing: not having enough room for all the seeds that were sown. This is not the worst problem to have, for the seedlings bring us joy and they are a way to spread joy to the community, which is needed at the moment. If you feel comfortable and have extra seedlings, set them on the street with a sign stating “free seedlings” or in my case “Setzlinge zu verschenken.” Be sure to wash the outside of your pots with a mild soapy mixture to prevent the spread of the virus, being careful not to get soap on the soil. Your seedlings will brighten someone’s day on their walk outside the home.
The Balkongarten packed with plants. I can’t wait until the spring bulbs die back so the herbs, tomatoes, and peppers can go into the balcony boxes.
It’s important during this time not to lose hope. We will get through this crisis and become stronger as a result. I hope you are staying safe and if you’re feeling stressed, remember that a garden, whether it’s a large plot of land or two pots on a windowsill, is there to help soothe an anxious mind.
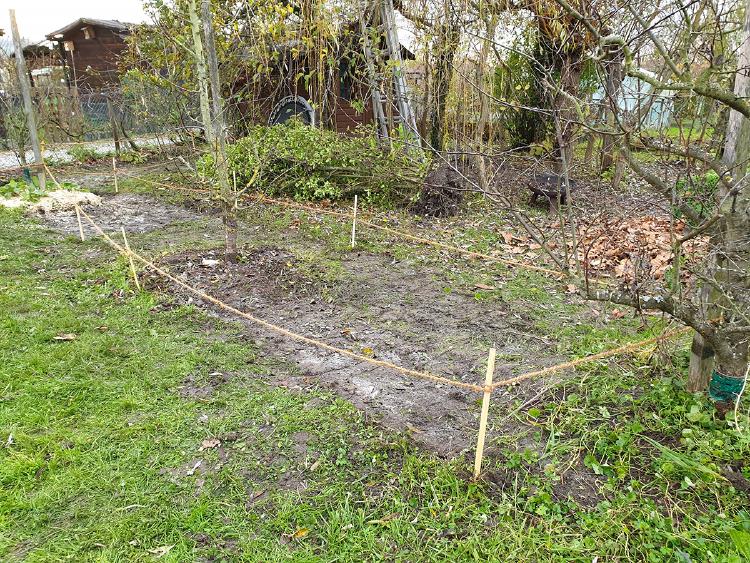
The best and worst thing about gardening is the wait. In today’s world of instant gratification many would argue it’s always the worst, but gardening is more about observing and enjoying the process rather than the end result. Unfortunately, there are projects that are oh-so-difficult to wait for. I’ve been dreaming up a wildflower meadow project since May of last year, patiently waiting for autumn to arrive in order to start it. When it finally came, the garden crew and I completed phase one of building and I find myself eagerly awaiting phase two in the spring: emergence.
There are a few exciting questions I’d like to answer about this project:
Which of four different wildflower mixes will do best on the plot?
Which of two sowing methods will be most effective?
How will wildflower meadows look in a small space and will they actually be low maintenance?
What insects and other wildlife will the meadows attract and how will they change the ecosystem of the Kleingarten?
The two main reasons we sowed wildflower meadows in small areas are to increase wildlife and to reduce mowing in the least used spaces on the plot while keeping it aesthetically pleasing. There are many small, awkward, unused spaces within the garden serving no purpose other than being empty. We could potentially transform the areas into spaces for food production but unfortunately I know we won’t have the time to properly maintain them against the aggressive weeds. For the time being we needed a useful, low-maintenance solution for these challenging spaces, so why not attract beneficial insects and wildlife to the garden?
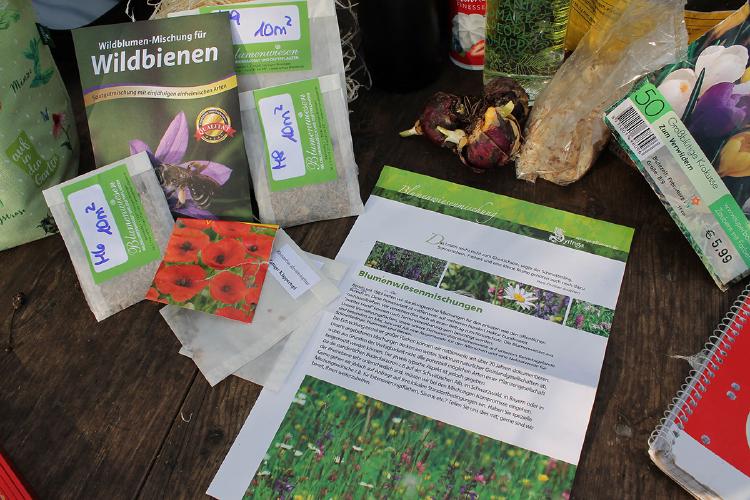
Info page from the nursery and packets of seed mixes.
I decided to order mixes from a local nursery not only to support the local economy but to also utilize their knowledge of what grows best within the region. The mixes were chosen based on the type of soil the allotment contains and the overall goal we’d like to accomplish. The nursery could even create a specialized mix based on our soil, sun, moisture, and whatever wildlife we’d like to attract but I opted out of this in order to test their pre-made mixtures. The ones chosen were a universal, half shade, walkable grass, and wildbee mix.
The universal contains a mixture of poor-dry soil type and rich-wet soil type wildflower seed. This mixture is used to take the guessing game out of what seed will succeed, since the conditions will select which type will survive. It’s a bit of an insurance policy—if you don’t care and just want a meadow, or you misrepresent your soil conditions—the seedlings best adapted to the conditions will survive. I predict the dry-sandy soil seedlings will be out-competed by the wet-clay seedlings, but I could be pleasantly surprised that a few of the dry varieties persist. This mixture should be a success no matter what.
Half shade was chosen for the sections of the garden that contain shade. Most of the seeds in this mix are generalists tolerating any soil type from sandy loam to heavy clay so it should be a successful mix as well, though the description online states we may not see many blooms until the second year. The full glory of a meadow can be a multi-year process.
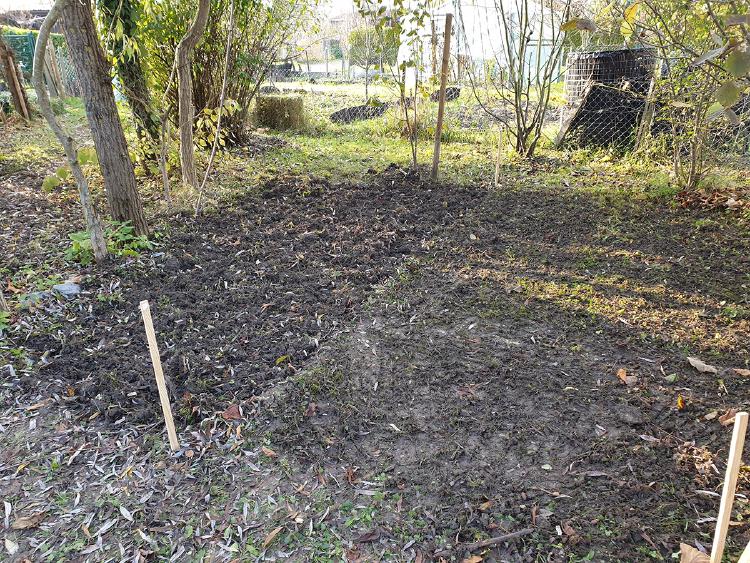
Half shade section marked out. Left is the break-up ground method; right is the soil scratching method.
The walkable grass contains multiple varieties of native grasses with a few wildflower species. The Kleingarten needs to be sown with some grass seed, since it is patchy with mud in heavily trafficked areas, so I chose this for its function as a pathway as well as a food source for native insects and wildlife. This mix’s description states it can be mowed more often, handle trampling, and recover quicker compared to a traditional meadow. If it’s successful against foot traffic, then this autumn the garden crew will help sow more grassy pathways throughout.
The last mix chosen was a wild bee mix. The nursery’s website stated that it was created in collaboration with a wild bee expert to take into account the nectar and pollen production required for bees to raise healthy brood. It’s also designed to attract multiple species of bees including silk bees, fur bees, mason bees, carpenter bees, bumblebees etc. without containing invasive species of plants. I really hope this mix is successful, though I have the feeling it will not thrive as well as the others since many of the plant species listed prefer sandy or well-draining soil. But the success of any mix is better than nothing: even if this particular mix does not survive, many bee species will still benefit from the other three types sown.
Wild bee mix packet with universal mix packet and red poppies packet in foreground. I added a few poppy seeds to the universal mix for fun.
This project also compares which of two sowing methods will be effective. Each seed packet was for 10m2 (107ft2). We roughly divided the 10m2 plots in half for each method (see half shade photo above), one hardworking method of removing sod and breaking up the ground, as recommended by the nursery’s instructions, and the other easier method of soil scratching with rakes. Soil scratching involves a few extra steps of mowing the area as short as possible, almost scalping it, then vigorously scratching the surface in a few directions with a sturdy leaf rake, then repeat the scratching in different directions with a bow rake to cut a little deeper into the ground. The goal with this technique is to weaken the grass roots without the slow backbreaking method of completely removing the sod. I have the feeling that the harder method of removing and breaking up grass will win, especially since the lawn mower is so old we couldn’t lower the deck to complete the first step of cutting the grass short for the scratching method. We did, however, add some Yellow Rattle seed to the universal and wild bee mixes to help the wildflowers compete against the grass. I only added it to two mixes because I didn’t have enough seed for all four.
Yellow Rattle is a semi-parasitic species that feeds on grass roots effectively weakening the grass to create spaces for wildflowers to grow. It’s known as the “meadow maker” and is called Yellow Rattle for the rattling sound the mature seeds make within the pods; the German name is pretty adorable too: Kleiner Klappertopf- little rattling pot.
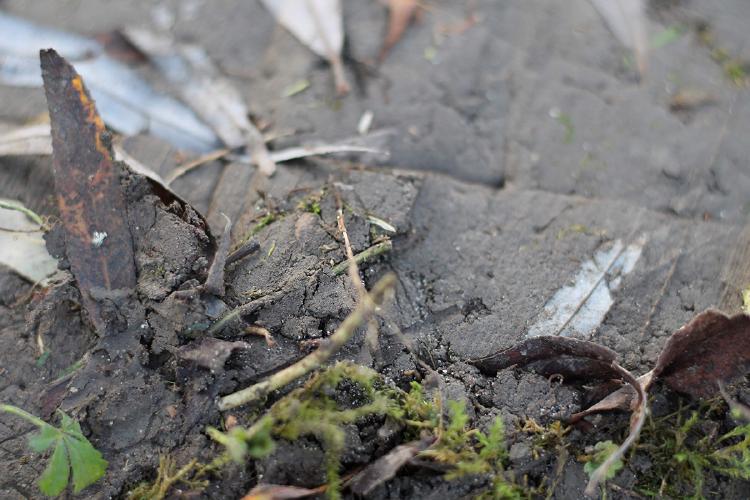
After preparing the areas with each method, we mixed the seed with some sand to allow for even distribution and to see where we had sown since the seeds blend with the ground. Finally we took a few pieces of scrap wood, laid them over the sown areas and walked on them to press the seed into the ground for good soil contact. If your soil is dry you can lightly tread the seed with your shoes but our soil was wet and sticky on those days so we didn’t want to risk re-collecting the seeds with our boots.
Can you spot the pressed-in seed in the center?
There is an easier third method that is probably the most effective but requires time. Lay out a large black or dark colored tarp, which no light can penetrate, over the area and place heavy bricks in the middle and around the edges. Leave for five months, best a year, to kill and break down the grass. It’s important to pull the tarp fairly tight and place the heavy objects at regularly spaced intervals so the wind does not catch it and expose the plants or weed seeds to light and air.
The third thing I am interested in is seeing how wildflower meadows look in a small space and if they really are low maintenance. Most meadows I’ve seen are in vast open areas. There are a few beautiful ones nearby that are more than an acre and I am curious to see how they look and cope in a small fruit orchard allotment garden. It’s my hope that they’ll look great, be as low maintenance as they claim, and inspire someone to add a small meadow in their garden or backyard in order to help native wildlife.
The beginning stage of meadow building is not the prettiest but will hopefully pay off this season. The wild bee mix was sown between the right and middle tree; the universal mix was sown between the middle and far left tree.
The final and most exciting thing I’m interested in, what new insects and wildlife will we see next year? To be honest, I have the typical reaction towards insects: I hate when they fly around or are on me. I’ve always loved spotting them move about the garden but as soon as they take off toward me, they freak me out. I appreciate the hard work they do in our gardens of breaking down dead organic matter, improving soil fertility, pollinating our plants, and yes, even eating our plants, because those ‘pests’ we love to hate attract useful predators. And the more I’ve learned about honeybees, the more comfortable I’m becoming with insects in general. As long as they are not physically on me, I love them.
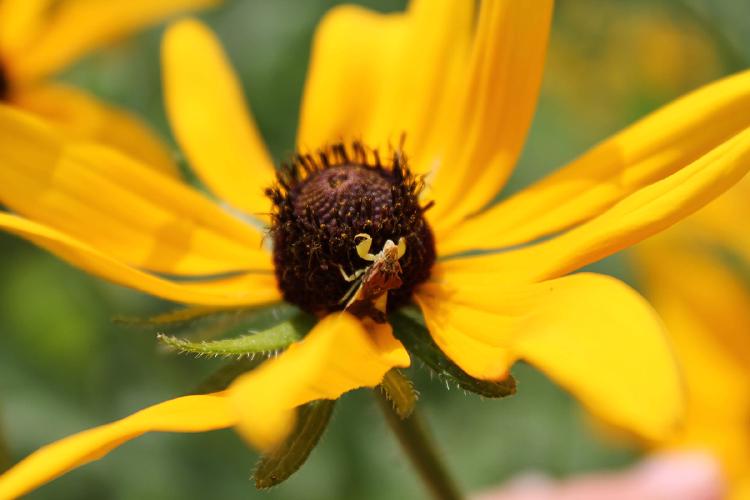
Love watching this guy posed on a black-eyed susan. If you know what insect this is, let me know on Twitter! @hereisthedill (Photo taken in Ohio garden)
There are so many fun interesting things about this project that I’ve never been more excited for spring to come. I will say I am worried that I’m getting my hopes up too much. The grass and weeds of this allotment are aggressive and if there’s one thing I’ve learned is not to set such high hopes for this space. I’ll consider it a success if we can get just a few wildflowers to stay in the battle against the weeds.
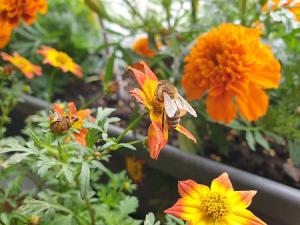
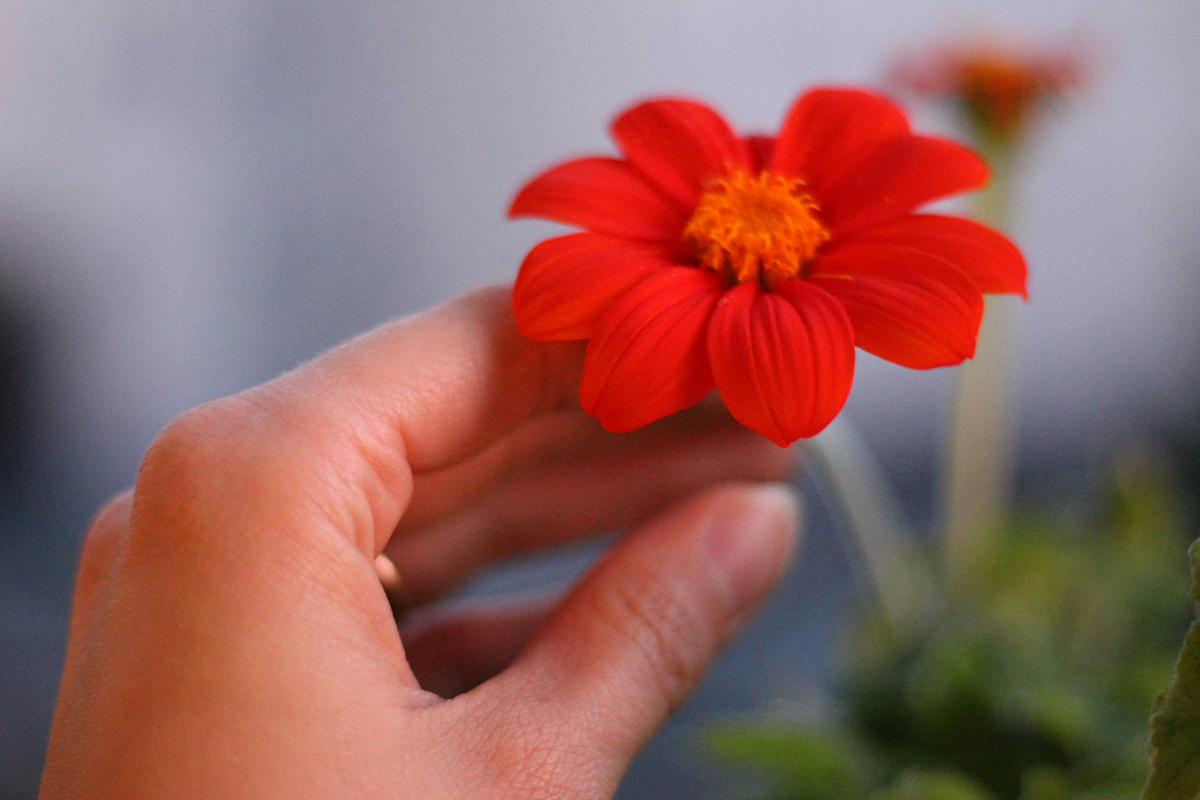
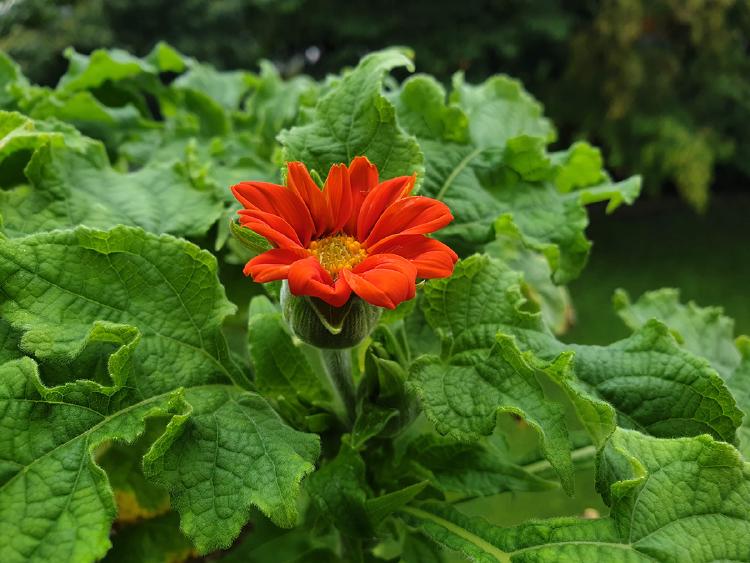
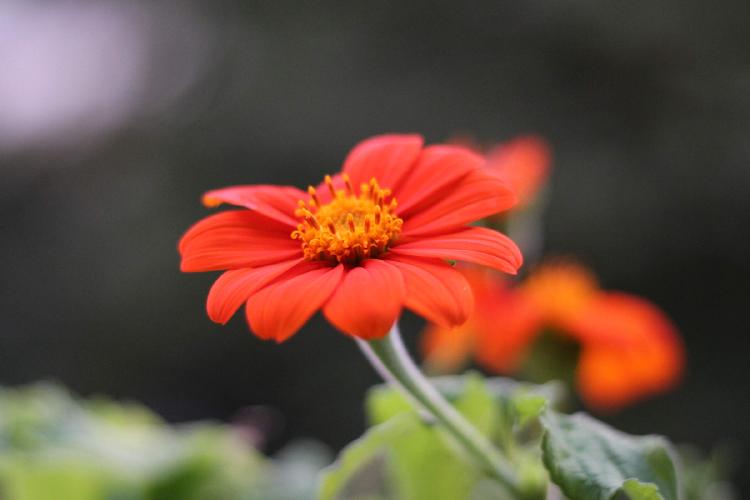
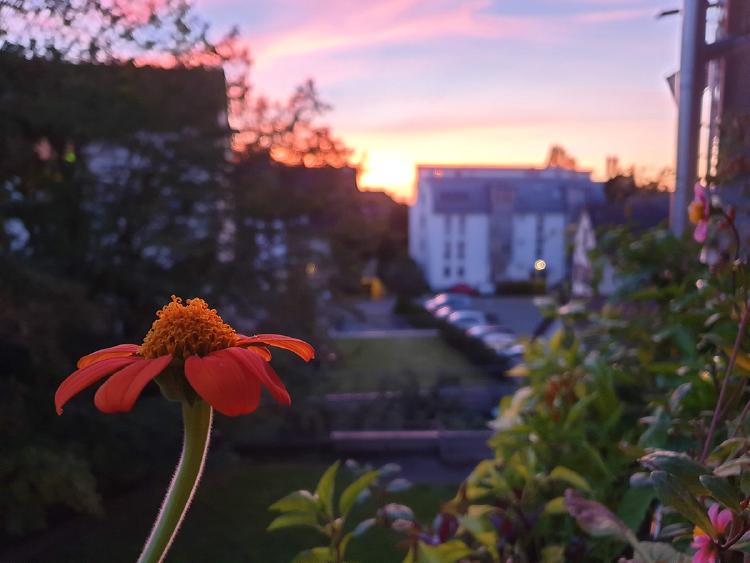
I want to talk about a flower I fell in love with growing this year. It’s called Tithonia rotundifolia, commonly known as Mexican Sunflower or Rundblättrige Tithonie in German. There are many things about this plant that I love, but the main reason is that it’s easy to grow from seed and very forgiving, so beginner balcony growers take note!
First bloom opening up for the season
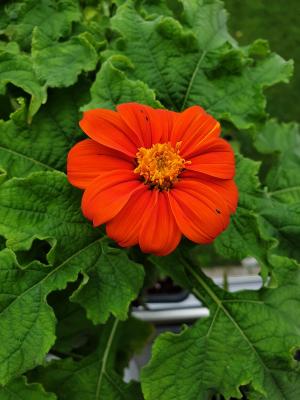
Fresh electric orange bloom
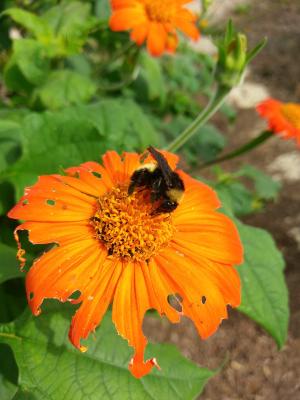
Bumblebee on fading bloom
Tithonia rotundifolia produce sturdy stems and have the ability to reach over 1.4-2m (4-6ft) in height, which is tall for a small balcony space but the wonderful thing about this plant is you can control its height by pinching out its growing tips to induce compact branching growth, much like basil, and grow them in a small sized container to restrict overall growth. Their leaves have a large beautiful triangular shape with a velvety soft touch. The flowers present sunny yellow disks with otherworldly electric orange petals that almost seems to glow. When fading, unfortunately we have to tolerate the less vibrant bright orange. Their flat upright facing blooms invite native bees and other insects to land on them and if deadheaded regularly, they will produce buds until frost. Collecting seed is also easy when a few flower heads are left to seed.
Missouri Botanical Garden
I’m really excited to grow these plants again next year because I think they will make a beautiful shade screen on our hot south facing balcony. They were grown in balcony boxes with 15cm (6in) depth and grew 60-70 cm (24-27in). Next summer, they will be planted in a tall 60cm (24in) pallet pot to see if they’ll reach their full height. I tried growing tomato vines in the tall pallet pot in order to create a shaded section but they were too much of a hassle for our space.
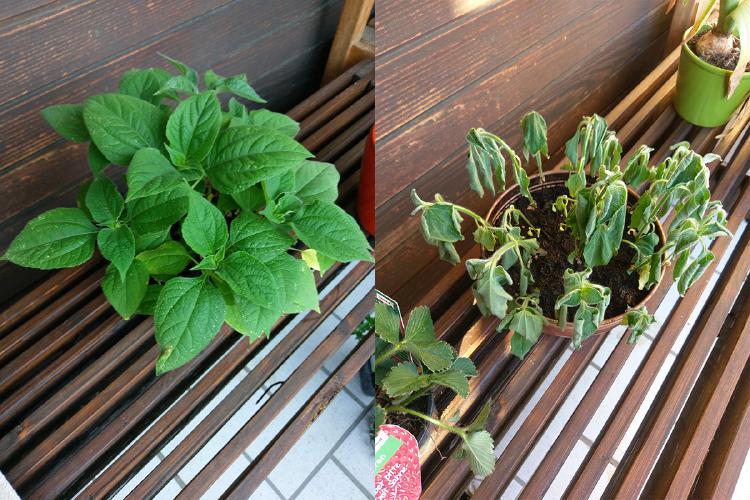
They are, however, greedy plants requiring full sun, weekly/biweekly feeding, and daily watering when grown in containers. If forgotten for a day or two they will wither to the point of seeming lifeless but don’t worry, they will quickly forgive you once provided with water again, almost expanding before your eyes. Next year I’ll try growing some in the Kleingarten and imagine once planted out they will take care of themselves so long as they are not in a waterlogged area. Slugs will probably be the biggest problem.
Me forgetting to water the seedlings one day but they perked up a few hours later
If you need a back of the garden border plant or have 15l (4 gal) or larger container, give this beauty a try next season; it will not disappoint.
Over the past few years I’ve been changing my gift-giving game. I used to give generic items that people might like but might not be useful to them. When receiving items like this I thought, “if I don’t like receiving gifts like this then why should I give them?” It’s a waste of money and the person is stuck trying to figure out what to do with it. I’ve changed my mindset to giving things that I know they need/want, are useful, something enjoyable, or money when nothing fits the above criteria. At any point during the year, if a person says they’d like something, I make a note of the need/want on my phone for future gift-giving occasions. One Christmas I gave jars of red and green M&Ms with a little cash hidden in the center, creating a 3-in-1 useful gift with the delayed experience of finding money. I’ve also thrown parties that the person will enjoy, but lately I’ve been giving plants to friends who I know will enjoy them.
If you’re at a loss for a gift, consider giving a plant. Plants are wonderful gift-giving investments as they are constantly morphing through the seasons in life, hibernation, and death, and we are privy to watch. When in bloom, they can attract visiting pollinators causing you to pause, observe, and enjoy the present moment, while they are busy sipping away at the sugary reward within. Live plants provide more value than any cut flower arrangement can, and if you give something that is not obvious at first, like the M&M jar, the mystery will reveal its secrets over time.
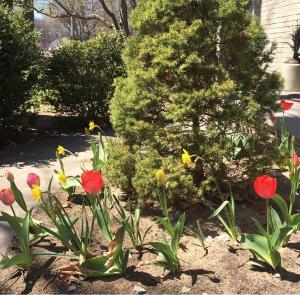
Tulips and daffodils were planted near her front door. Crocuses and daffodils were planted near the front lawn
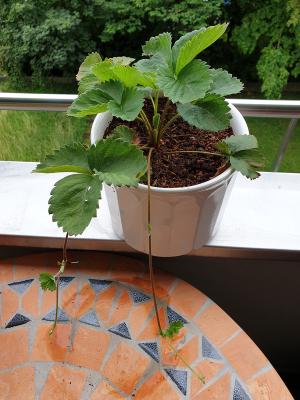
Strawberry plant with runners
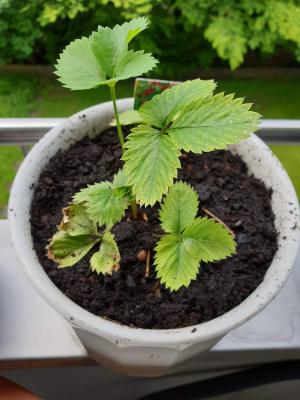
Sick strawberry plant after removing dead leaves and transplanting to a new pot
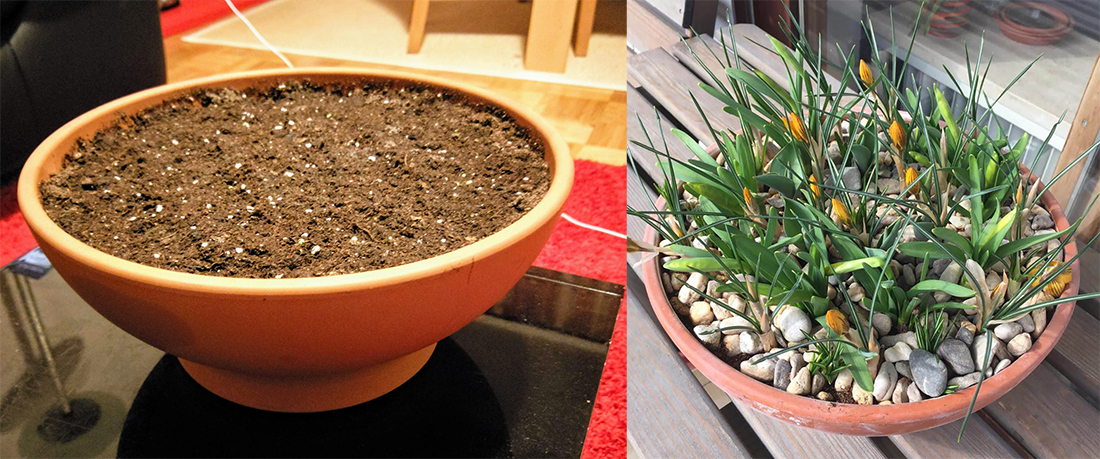
In October 2018, I gave what seemed like a bowl of rocks and dirt for a friend’s birthday. I told her, “place it outside for winter, keep it moist, and you’ll be rewarded in spring.” To her delight, in March she produced yellow and purple crocuses, in April came the daffodils, and in May tulips should have popped up—but they never did. This might of been a bad batch of tulip bulbs, or my excitement in overstuffing the pot. Either way, she loved it.
Inspiration for this surprise spring bulb planter came from an act in October 2017, when I took advantage of a half-off spring bulb sale and planted over 100 bulbs at my mother-in-law’s house. She forgot about them and the following spring was pleasantly surprised with a bounty of color in her front yard. Over time, the bulbs will multiply and provide even more color for her to enjoy.
If you don’t want to delay the gift’s suspense, you can always pot-up a variety of plants, creating a unique planter to tailor someone’s specific interests. In the summer of 2019, I gave a group of friends a hummingbird planter. The group was so generous allowing my husband and I to crash at their place for over a week, I decided to give them a special planter. The idea came from one of the researcher’s subjects of study, hummingbirds. He travels a lot and doesn’t have time to maintain a traditional feeder which requires cleaning and refilling every few days to prevent spoiling. I potted-up a large container with a few varieties of hummingbird favorites and told them to wait. It attracted multiple insect pollinators including bees, butterflies, and wasps and a month later, they spotted a hummingbird feeding from it!
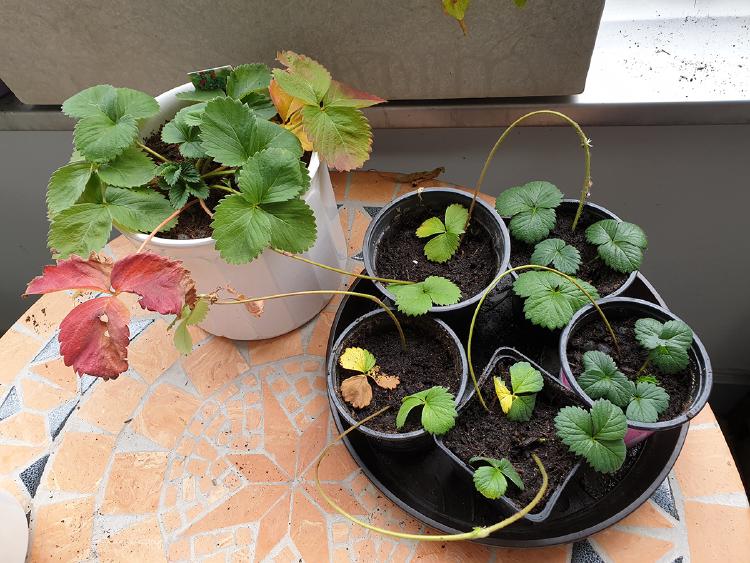
This fall, a friend is expressing her desire to create a Balkongarten for next year and it just so happens that I have a strawberry plant with runners which I can give for her birthday in December.
If you decide to give a friend or family member plants, be sure to give them something low maintenance or at their skill level. Spring bulbs in a yard require no maintenance. The spring bulb planter required minimal watering, maybe once a month to every other month in winter. Something she could handle since she and her husband grow a forest of tomatoes, eggplants and peppers on their balcony every summer. Balkongarten friend is a beginner and is nervous that she’ll have a brown thumb, so I’m giving her easy-to-grow seeds and a difficult-to-kill plant. How do I know it’s difficult to kill? Well, I abused this particular strawberry plant. A lot of events occurred in 2018—the homemade potting mix that killed a bunch of plants; the balcony being demolished for the entire summer—that caused this one euro strawberry plant to be severely neglected in its original tiny pot. Come spring 2019, it was still alive, barely, so I finally planted it in a larger pot thinking it was probably a waste of soil. Turns out it recovered and by late summer started creating runners! No strawberries have been produced on this particular plant, which isn’t a surprise due to its abused past, so I can’t guarantee she’ll get strawberries in spring 2020 but I can guarantee that they’re tough to kill.
To root strawberry runners, all you need to do is fill up a pot with potting mix, push the plantlet into it, and wait a few weeks for the roots to develop before cutting the running stem from the mother
The hummingbird planter included a red Bee balm Monarda, a light blue Giant Hyssop Agastache foeniculum, a white Lantana Lantana camara, and a purple Salvia Salvia. In hindsight, I should have bought more mature Lantana and Salvia plants, as they were too small to compete and were engulfed by the Bee Balm and Giant Hyssop
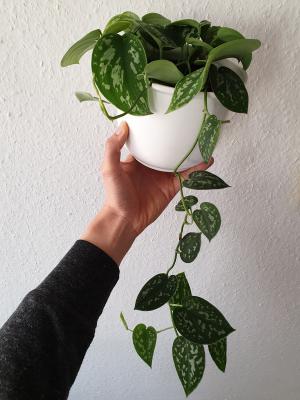
Efeutute Epipremnum aureum. Small money plant propagated from cuttings Planted in an insert pot placed within a white decorative pot
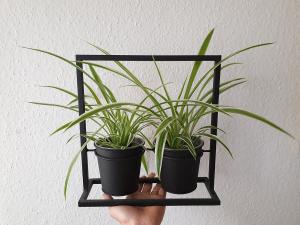
Gruenlilie Chlorophytum comosum. Small spider plants from spiderettes. Spiderettes are similar to strawberry plantlets created by runners from the mother plant.
The hummingbird planter requires a slightly higher skill level and one that I knew the group could handle. They already had planters of marigolds, hot peppers, and herbs on their deck, so I filled a large container with low maintenance, hummingbird-loving plants. All they had to do was water it, feed it every so often, and deadhead it so the flowers would keep coming back—the same maintenance they were already doing with their other containers. At the end of the year or next spring, they could also split the plants in half to create more containers and potentially attract more hummingbirds. Or, they could plant them out in the garden, so long as they don’t mind the Bee Balm and Giant Hyssop spreading. These are native to their region but are members of the mint family. If you’re familiar with mint family members you know they grow like weeds. So they either need space to grow or barriers to contain them, such as a berm—the strip of soil between a street and a sidewalk.
If you have a friend or family member expressing they’d like to grow something indoors, but are inexperienced or have a brown thumb, try Money Plant Epipremnum aureum (also commonly called pothos) or Spider Plant Chlorophytum comosum. These houseplants can handle neglect and recover well after neglected periods, especially the money plant. They are also great plants to learn propagation techniques. If giving a store-bought houseplant and you’re not short on time, I suggest repotting it into a slightly larger pot at least one or two weeks before giving it. Waiting, will allow you to watch and care for it during its recovery after transplanting, and when given, will have started actively growing roots and shoots providing a boost of confidence for the person. Just be sure it’s in a pot with drainage, whether it’s in a light insert pot or a decorative pot with holes. If you plant it directly in a decorative pot without drainage holes, you’re setting up your friend for failure.
Plants are wonderful gift-giving investments. Just be sure to give the person a plant they can handle and one that fits their personality in order for it to be a successful gift-giving experience.